Near-production hardware prototyping with TinkerForge
TinkerForge is a near production
hardware prototyping platform. It allows you to quickly create durable hardware stacks that can control motors, use sensors, inputs, displays and much more including working with high power devices. All of that is combined with excellent software stack and bindings for more than 15 programming languages.
How does it work?
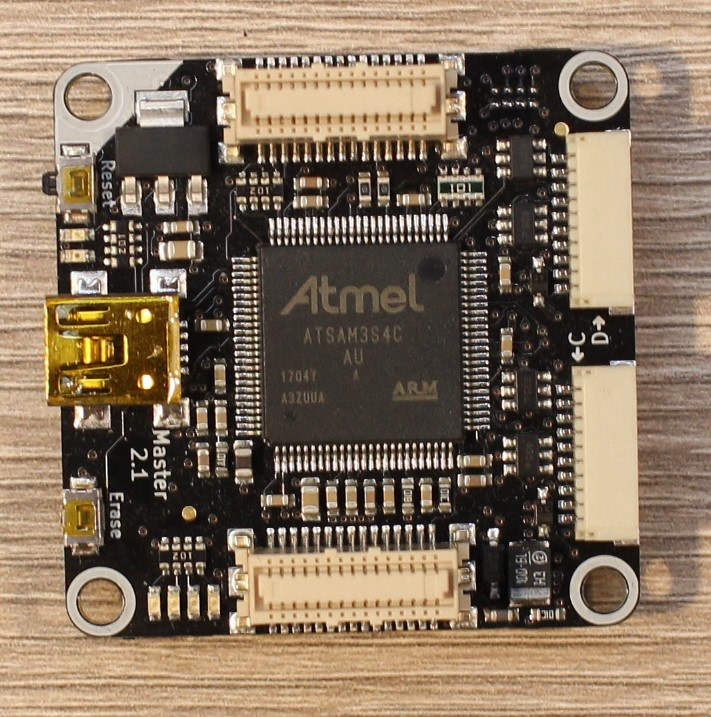
TinkerForge systems are based around Bricks - stackable boards that provide connectors for Bricklets and optionally control servos and stepper motors. Each brick can be connected to another by a vertical stacking connector allowing you to add as many as needed.
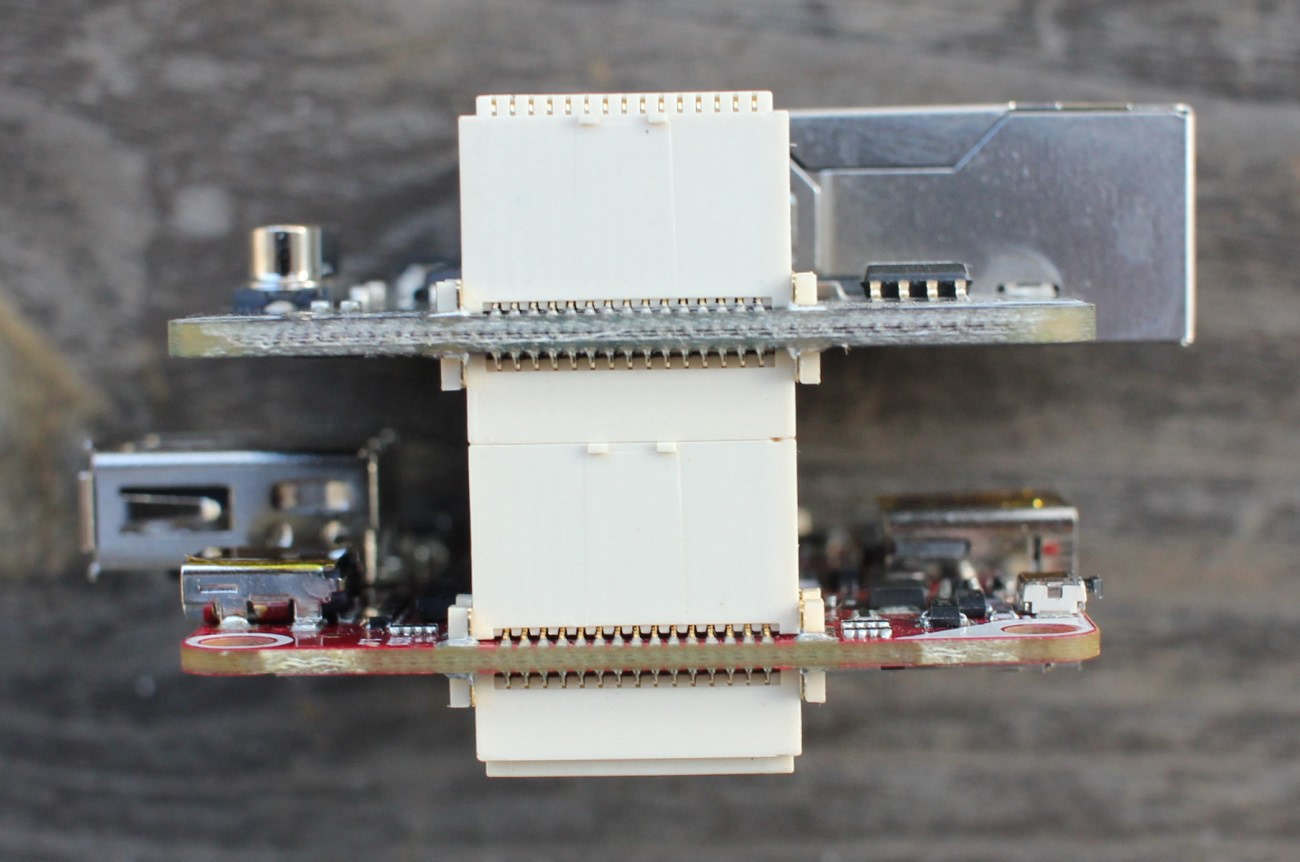
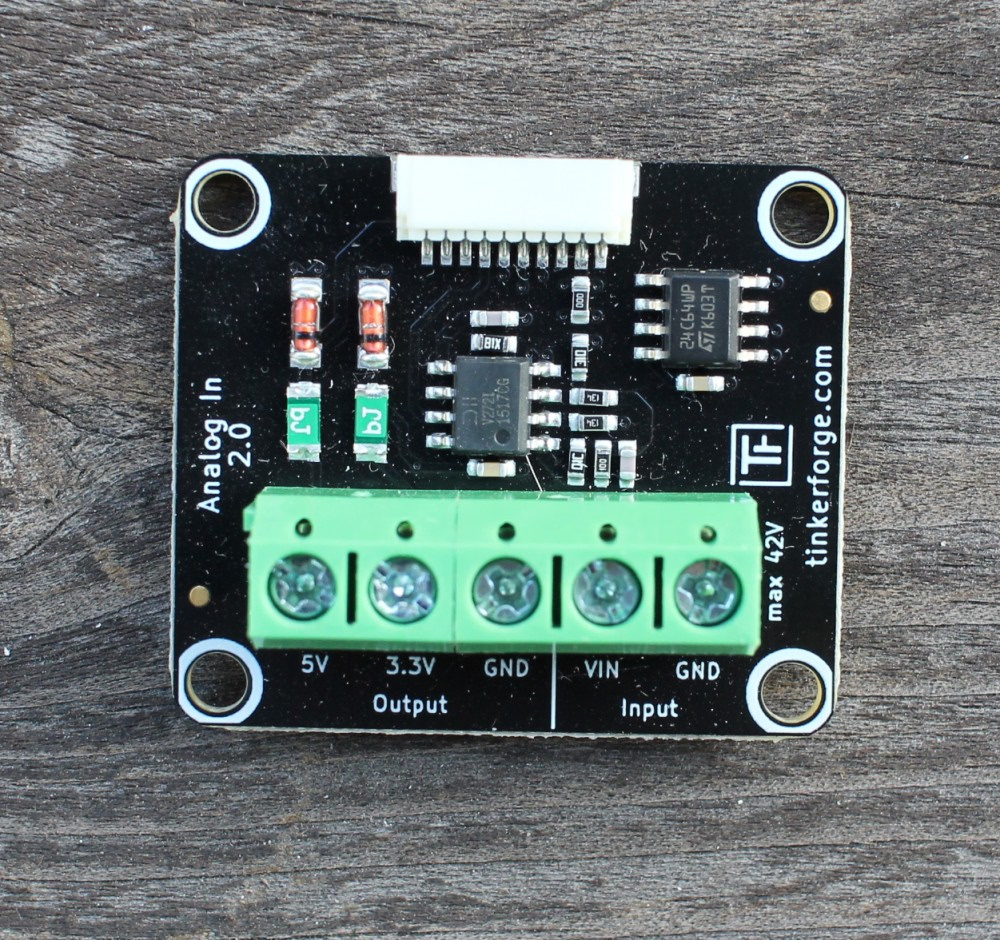
A Bricklet is a smaller single function PCB that provides ready to use (API, documentation, examples) component like Analog or Digital IO, but also various sensors, industrial power measurement, thermal cameras, displays, GPS, RS32 or RS485 and more. Check documentation for a full list. Each bricklet connects to a brick via standardized connector.
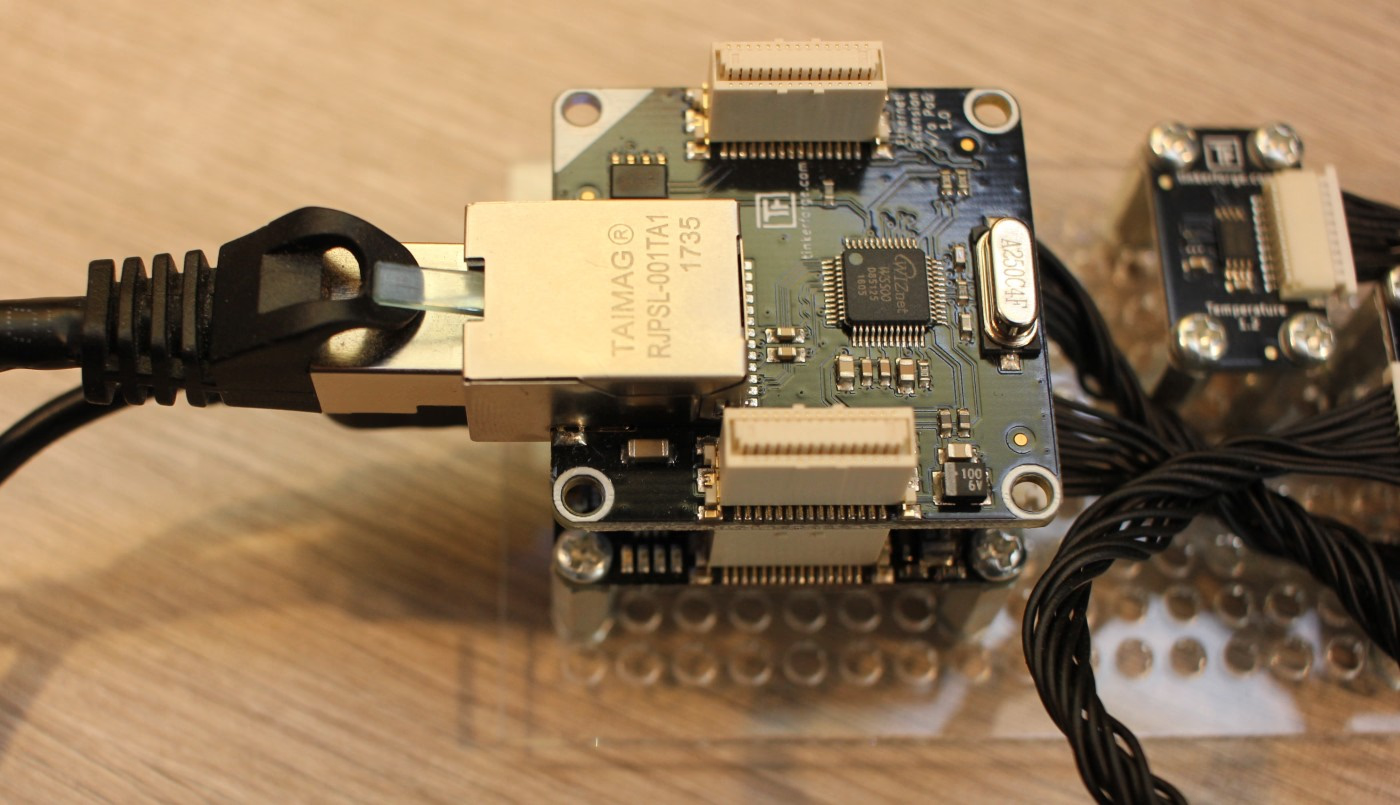
There are also optional Master Extensions that allow using the stack without direct USB connection - Ethernet, WiFi or RS485 master extension. You can stack one with your bricks and you are ready to go.
By default to code and use a stack of brick and bricklets you use a stack containing Master Brick that has a USB connector. You connect that to your PC (Win, macOS, Linux) and you can use their provided software as well as language bindings to write your code. The stack can't work on it own. On PC provided software will run a demon managing connected TinkerForge bricks. If you use one of Master Extensions then you just connect to the brick stack via network or RS485 instead of using the localhost demon.
The PC can be replaced with a single board computer like Raspberry Pi or TinkerForge Red Brick which is a SBC in a shape of a Brick with stacking connectors. In such configuration the code is stored and run on the SBC.
Additionally TinkerForge offers RPi HATs that provide bricklet connectors allowing you to use their Bricklets with Raspberry Pi without the need of Master Brick and alike.
In comparison to Arduino or Raspberry Pi electronics prototyping via GPIO here you don't really use GPIO and various raw components but pre-made boards - a locked but very easy to use ecosystem.
Where to get it?
You can visit TinkerForge Shop as well as look for a local representative. The prices will be higher that your typical Arduino/Raspberry components, especially those Chinese ones. On the other hand you get a good quality and very good software support. If you want to play with simple electronics on the cheap you can go with the mentioned platforms, if you want to prototype a more complex device or control existing one this could be a better choice.
Who uses it?
TinkerForge has some success stories aside of people playing with it. There is an SOFC-APU controller based on RPi and TinkerForge components - oven/power generator, high currents, burning fuel.
Igor Wallossek used TinkerForge boards to create a PC power draw measurement platform - measuring and logging every aspect of components and PC power draw.
The company itself took part in prototyping and then customizing boards for some project like smart city lights and in other applications.
Brick Viewer
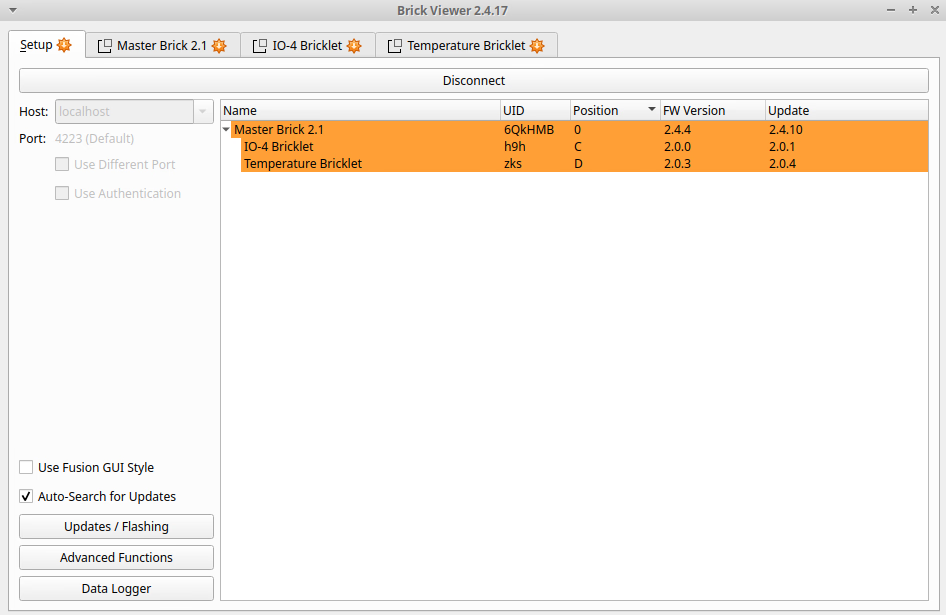
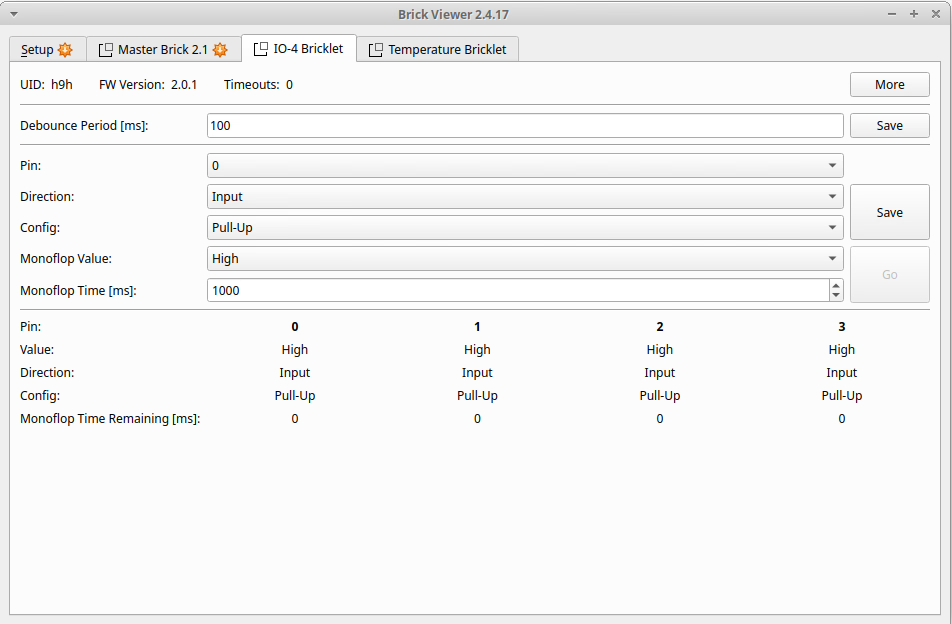
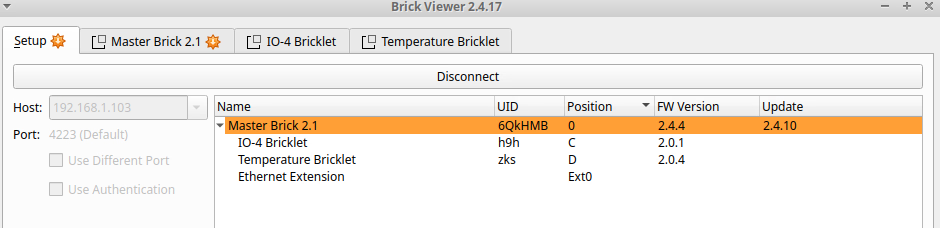
The main application for testing/debugging/playing with bricks and bricklets is called Brick Viewer. You have to install it (with Brick Demon along the way). They provide instructions for every supported operating system. On Ubuntu you add a new APT repository and just install what's required.
Programming in Python
If you go to any Bricklet or Brick documentation page you will notice multiple languages on the support list. I've chosen Python because why not ;)
Python bindings can be install via pip. You will need the brick demon running if you are connecting the brick stack via USB.
The boilerplate code looks like so:
from tinkerforge.ip_connection import IPConnection

HOST = "localhost"
PORT = 4223


if __name__ == "__main__":
    ipcon = IPConnection()  # Create IP connection
    ipcon.connect(HOST, PORT)  # Connect to brickd
    #  yor code here

    ipcon.disconnect()
You connect to either the brick demon running locally or you specify IP if you use one of network master expansions. When you connect you can use given brick or bricklets API.
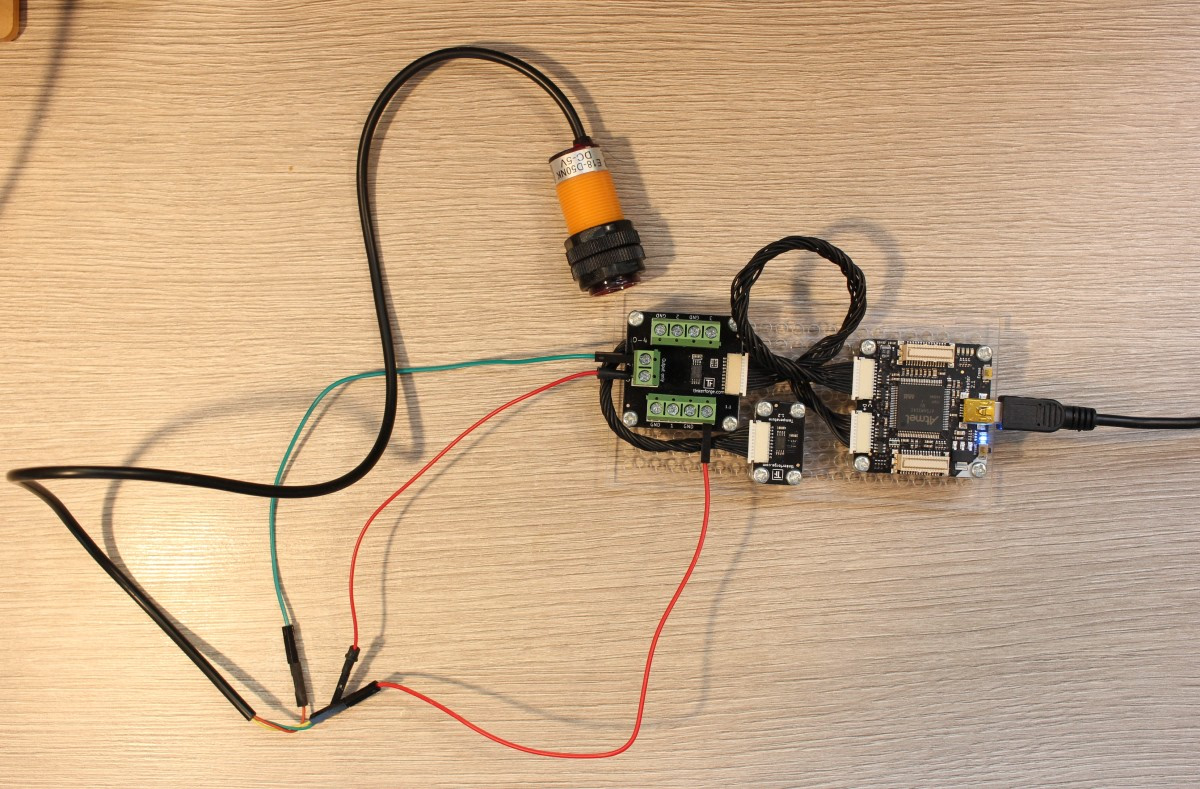
For example using small 28BYJ-48 stepper motor with ULN2003 controller requires 4 output IO pins. You can control this motor with an IO bricklet (although there is a stepper motor dedicated brick capable of handling way more power hungry motors):
import time

from tinkerforge.ip_connection import IPConnection
from tinkerforge.bricklet_io4 import BrickletIO4

HOST = "localhost"
PORT = 4223
UID = "YOUR IO BRICKLET ID"

all_pins = 0b1111
steps = [
    0b0001,
    0b0011,
    0b0010,
    0b0110,
    0b0100,
    0b1100,
    0b1000,
    0b1001,
]
current_step = 0
debounce = 1


def set_pins_low():
    io.set_configuration(all_pins, BrickletIO4.DIRECTION_OUT, False)


def set_pins_high(pins):
    io.set_configuration(pins, BrickletIO4.DIRECTION_OUT, True)


if __name__ == "__main__":
    ipcon = IPConnection()  # Create IP connection
    io = BrickletIO4(UID, ipcon)  # Create device object
    ipcon.connect(HOST, PORT)  # Connect to brickd

    io.set_configuration(all_pins, BrickletIO4.DIRECTION_OUT, False)

    for i in range(10000):
        high_pins = steps[current_step]
        io.set_debounce_period(debounce)
        set_pins_low()
        set_pins_high(high_pins)
        current_step += 1
        if current_step == len(steps):
            current_step = 0
        time.sleep(0.001)

    ipcon.disconnect()
I've used bit old IO-4 v1.1 Bricklet (now replaced with a newer model but still supported) that has 4 IO pins. The API for this version uses handy pin selectors allowing you to operate on multiple pins at once and to turn the stepper motor we have to set specific pins high in specific order - 1, 1 and 2, 2, 2 and 3 - and so on. The steps
list contains pin selectors for each step (pin4/pin3/pin2/pin1) where 1 is pin selected.
In a loop I set all pins low and then for a short period set specific pins high. Each step causes to move the motor by one step. Reversing the order would cause the motor to move in the opposite direction.
Each brick and bricklet has a unique ID that is used in the code to bind to it. You can get the UID from the Brick Viewer.
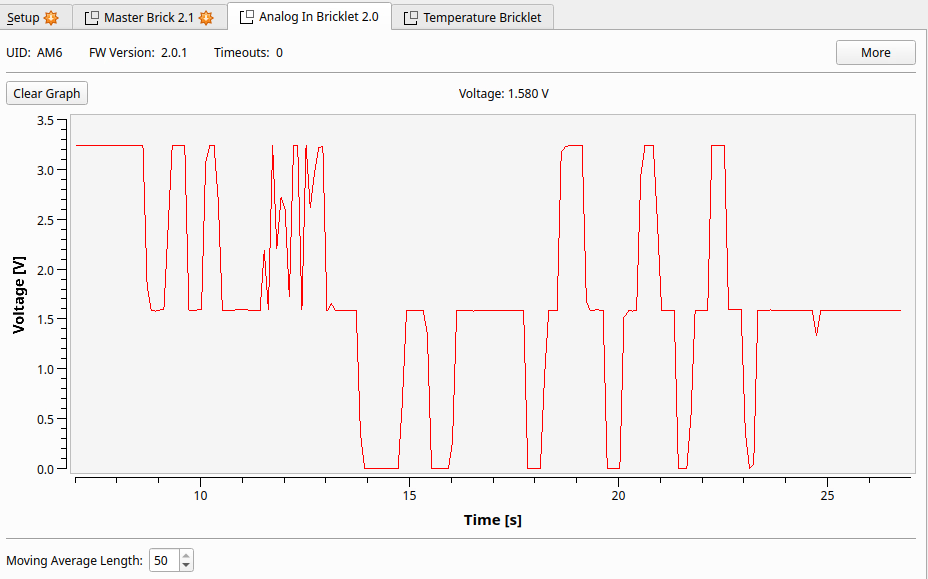
Analog bricklet is also simple to use. Potentiometer based joystick will cause varying voltage drop on the analog input and based on the drop from 3.3V max voltage we can get a % of how far the joystick was pushed in a given axis:
from tinkerforge.ip_connection import IPConnection
from tinkerforge.bricklet_analog_in_v2 import BrickletAnalogInV2

HOST = "localhost"
PORT = 4223
UID = "YOUR BRICKLET ID"


if __name__ == "__main__":
    ipcon = IPConnection()
    ai = BrickletAnalogInV2(UID, ipcon)

    ipcon.connect(HOST, PORT)

    voltage = ai.get_voltage()
    print("Voltage: " + str(voltage/1000.0) + " V")
    ipcon.disconnect()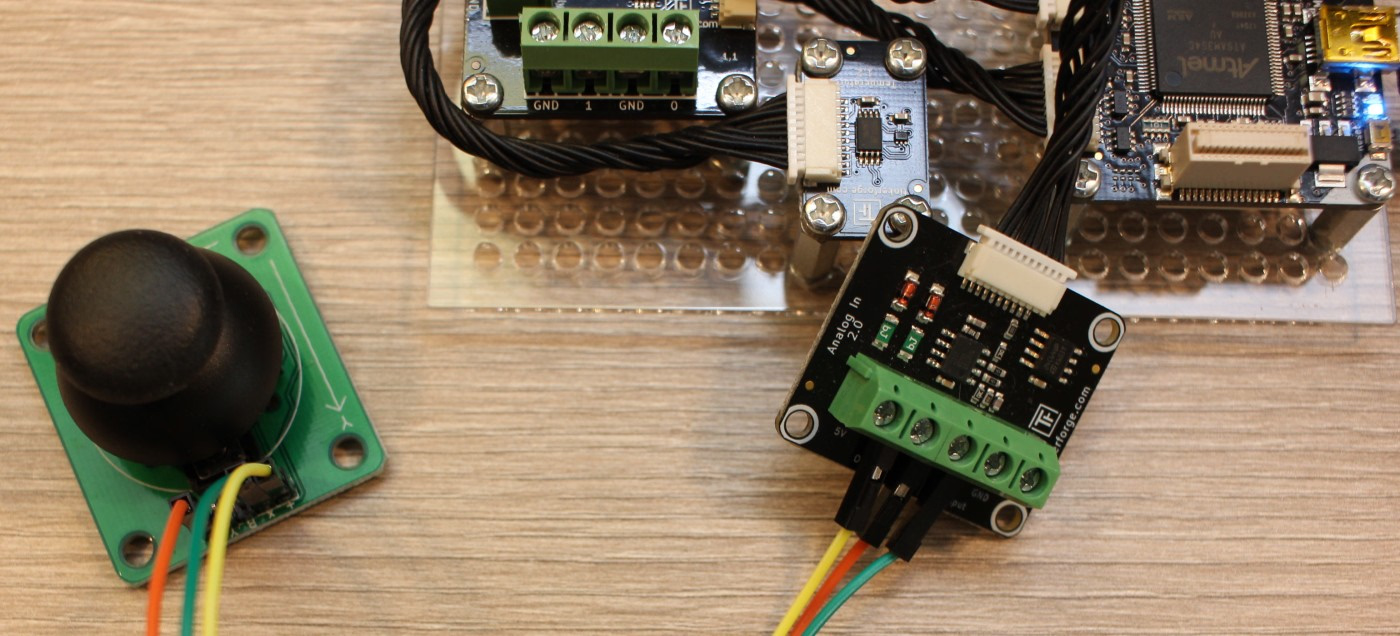
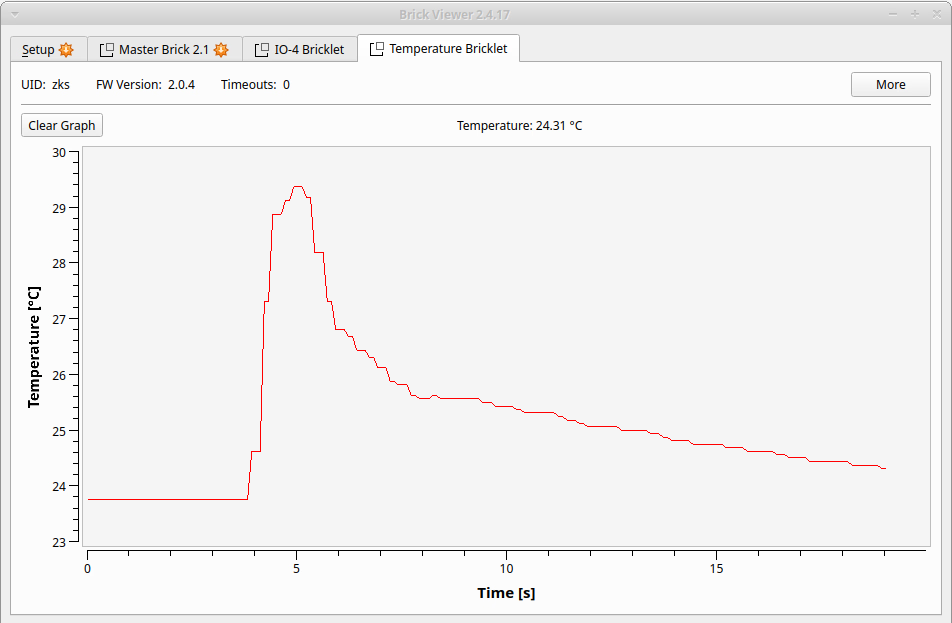
And if you plug in the Ethernet master expansion you will be able to configure it in the Brick Viewer to then use the stack over network. For my local network I set a fixed IP and then remotely go the temperature from the temperature bricklet:
from tinkerforge.ip_connection import IPConnection
from tinkerforge.bricklet_temperature import BrickletTemperature


HOST = "192.168.1.103"
PORT = 4223
UID = "YOUR BRICKLET ID"


if __name__ == "__main__":
    ipcon = IPConnection()
    sensor = BrickletTemperature(UID, ipcon)

    ipcon.connect(HOST, PORT)

    temperature = sensor.get_temperature()
    print("Temperature: " + str(temperature / 100.0) + " °C")

    ipcon.disconnect()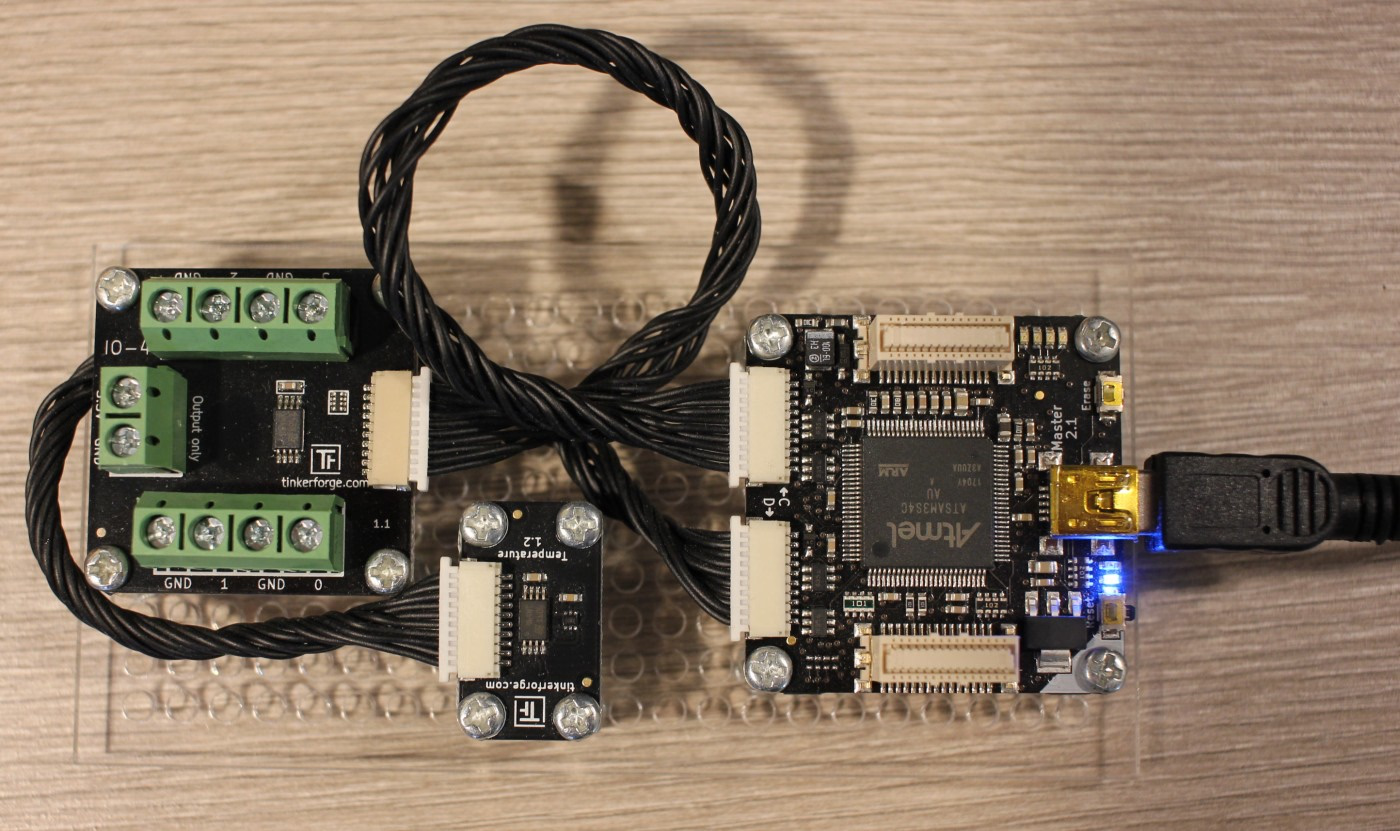
Summary
TinkerForge components allow using quite complex stacks quite easily and quickly. Brick viewer plus the documentation and APIs make it just work
and is really handy for prototyping. On the other side this is a locked platform. If you need a specific component the company didn't provided as a brick or bricklet then you may end up not being able to use it with this platform directly (there is some API for creating own bricklets or you could use it via other microcontroller controlled by the same PC). Same goes for price - you pay extra for such specialized and EU made components.
Comment article