Generating memes and infographics with Pillow
Pillow is used for simple operations on images, like resizing, converting to other file formats, and so on. It also can be used to generate custom graphics like infographics or composites of multiple images - memes, infographics, and more. Let's take a look at how it can be done.
Working with Pillow
Let us start with a meme generator
- we want to take a JPEG image and a caption text and generate a meme where the text is written below the image on some background.
To get from the base image to end result it will take multiple steps so it's quite important to manage our code in a way that will be clear and easy to modify and manage. The boilerplate would look like so:
import PIL.Image


class MemeGenerator:
    def __init__(self, image_path, caption):
        self.image_path = image_path
        self.caption = caption

    def generate(self):
        image = self._get_image_object()
        # image operations here
        return image

    def _get_image_object(self):
        return PIL.Image.open(self.image_path)


image_object = MemeGenerator('./base_image.jpg', 'Some text here').generate()
image_object.save('result.jpg', quality=90)
This just opens the base image and does nothing to it. All the operations will be added as calls in the generate method. So get some JPEG as your base image and try it out. This boilerplate should generate a new image that is pretty much just the original one minus JPEG compression.
Borders and expanding an image
Pillow doesn't have a direct method to add a border to an image but this effect can easily be achieved by creating a slightly bigger image of said color and then pasting the original image on it:
import PIL.Image


def draw_border(image, border_size, border_color):
    original_width, original_height = image.size
    width = original_width + border_size * 2
    height = original_height + border_size * 2
    border_canvas = PIL.Image.new('RGB', (width, height), border_color)
    border_canvas.paste(image, (border_size, border_size))
    return border_canvas
So we take a Pillow image object, and we give border size and color. The function creates a new image with PIL.Image.new with the size of the original image plus double the size of the border (for top, bottom, left, and right border. Then we paste the original image at the correct position - if we want a 5-pixel border then we paste it at 5,5 position of the background canvas image.
Position given as (x, y) tuple starts from the top left corner of the image.
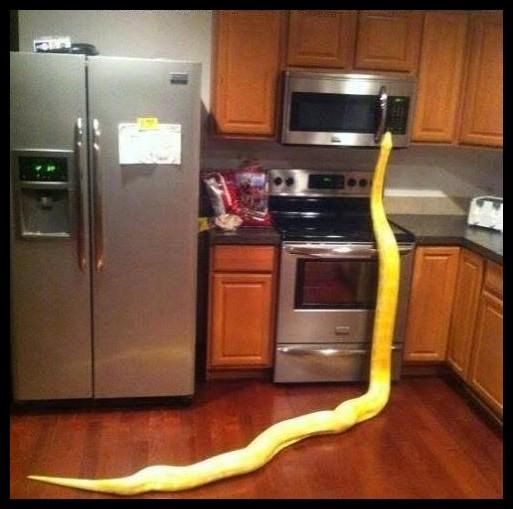
So our generate method would look like so:
def generate(self):
        image = self._get_image_object()
        image = drawings.draw_border(image, border_size=10, border_color='black')
        return image
I've put draw_border function in drawings.pu for clarity.
Writing text on image
To write some text on an image we need a font file (TTF, OTF, or other) - this also gives the opportunity to select the font that looks as we want.
Simple text writer would look like so:
def draw_text(image, text, text_color, text_size):
    font = get_font(size=text_size)
    draw_canvas = PIL.ImageDraw.Draw(image)
    draw_canvas.text((0, 0), text, fill=text_color, font=font)
    return image


def get_font(size):
    path = os.path.join('./font.otf') # set path to your font file
    return PIL.ImageFont.truetype(path, size=size)
And we would call it like so:
But as you can see the position of the text is fixed to 0,0 and if the text phrase is too long it will not break lines:
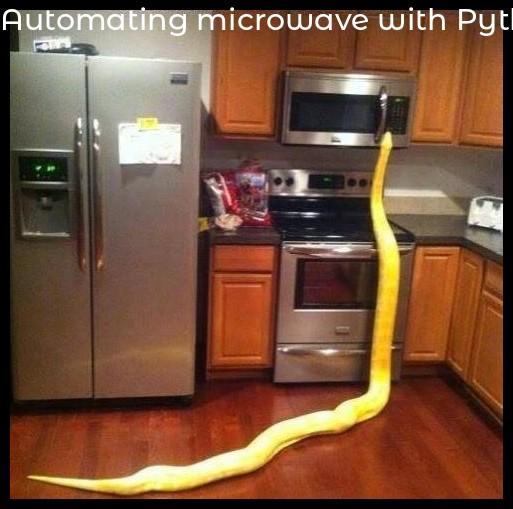
So what do we have to do? Typical meme format has text below the image and it should fit on the image as needed. So lets start with word wrapping:
import textwrap


def draw_text(image, text, text_color, text_size):
    font = get_font(size=text_size)
    draw_canvas = PIL.ImageDraw.Draw(image)
    text_width, text_height = draw_canvas.textsize(text, font=font)
    image_width = image.size[0]
    if text_width > image_width:
        character_width = text_width / len(text)
        max_characters_count = int(image_width / character_width)
        text_lines = wrap_text(text, wrap_width=max_characters_count)
    else:
        text_lines = [text]

    for row, line in enumerate(text_lines):
        draw_canvas.text((0, row * text_height), line, fill=text_color, font=font)
    return image


def wrap_text(text, wrap_width):
    wrapper = textwrap.TextWrapper(width=wrap_width)
    return wrapper.wrap(text)
Before we draw text on an image we can check what length and height it would take with:
We get the dimensions for the given font file and font size. If the width is greater than the image width then we have to break it into multiple lines.
Python has a built-in textwrap module that can help us with this. We can calculate how many pixels one text character takes and then how many characters would roughly fit on the image:
character_width = text_width / len(text)
max_characters_count = int(image_width / character_width)
text_lines = wrap_text(text, wrap_width=max_characters_count)
The TextWrapper will return a list of string - original text phrase split into lines that should fit on our image. To actually draw line by line we use this part of the code:
for row, line in enumerate(text_lines):
    draw_canvas.text((0, row * text_height), line, fill=text_color, font=font)
We enumerate each line to then draw it at the correct Y-axis position (lower and lower). So the first line would draw at 0,0 and the second line would draw at 0,some_height, and so on:
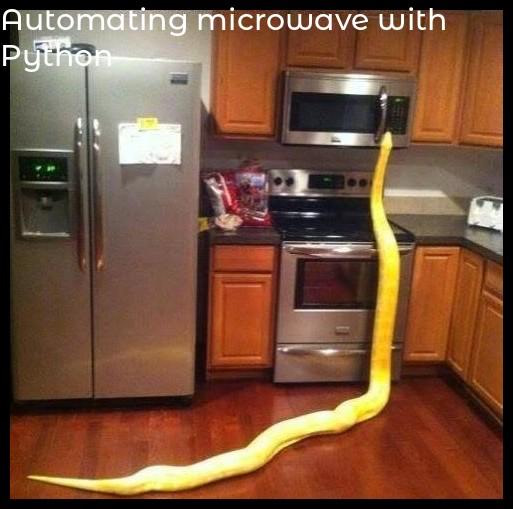
As you can see we wrapped the text but it's still being drawn in the top left corner of the image which we don't want. We will take care of that in a moment but few things to note here. The max_characters_count
is an estimate as some characters will take more pixels than others. You may want to alter this part of the code a bit like taking 90-80% of the max_characters_count
so that so even the worst-case scenario will break into lines properly.
Now how do we get the text below the image like this:
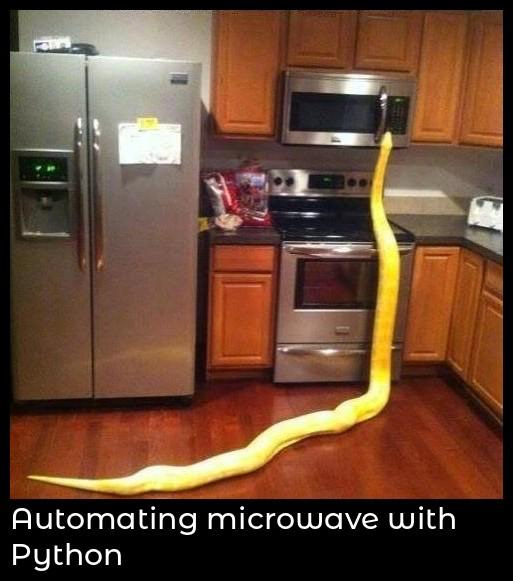
The flow is to get the total height all text lines would take and then expand the image at the bottom similar to how we expanded the image to draw a border. When expanded we can draw text there. This is getting a bit complex for one function so let us do some refactors first.
A good idea when handling complex operations with Pillow is to extract some operations into their own images. So we create an image with text written on it, get the original image, expand it by text height and paste the text image below it. This way text generation doesn't have to take into account coordinates on the original image, which simplifies things.
So we refactor our draw_text function into get_text_as_image function:
def get_text_as_image(text, text_color, text_size, image_width, background_color):
    placeholder = PIL.Image.new('RGB', (0, 0), background_color)
    font = get_font(size=text_size)
    draw_canvas = PIL.ImageDraw.Draw(placeholder)
    text_width, text_height = draw_canvas.textsize(text, font=font)
    if text_width > image_width:
        character_width = text_width / len(text)
        max_characters_count = int(image_width / character_width)
        text_lines = wrap_text(text, wrap_width=max_characters_count)
    else:
        text_lines = [text]

    total_text_height = len(text_lines) * text_height
    image = PIL.Image.new('RGB', (image_width, total_text_height), background_color)
    draw_canvas = PIL.ImageDraw.Draw(image)

    for row, line in enumerate(text_lines):
        row_height = row * text_height
        draw_canvas.text((0, row_height), line, fill=text_color, font=font)
    return image
At first we just generate a placeholder image to get text width and height, then we get the text lines as previously but in the end, we create a new image of the required size and draw text on it. We return the image with text while not doing anything on the original image itself.
Then we have to combine the original image and text image at the bottom of it with this helper function:
def bottom_expand_image_with_image(image, expand_image, background_color):
    width = image.size[0]
    height = image.size[1] + expand_image.size[1]
    expand_canvas = PIL.Image.new('RGB', (width, height), background_color)
    expand_canvas.paste(image, (0, 0))
    expand_canvas.paste(expand_image, (0, image.size[1]))
    return expand_canvas
So we create a new image with the combined height of both images and we paste each at the proper coordinates. The original image is at the top, while the text image is below it.
So our generate method looks like so:
def generate(self):
        image = self._get_image_object()
        text_image = drawings.get_text_as_image(
            self.caption, text_color=self.TEXT_COLOR, text_size=30, image_width=image.size[0],
            background_color=self.BACKGROUND_COLOR)
        image = drawings.bottom_expand_image_with_image(image, text_image, background_color=self.BACKGROUND_COLOR)
        image = drawings.draw_border(image, border_size=10, border_color=self.BACKGROUND_COLOR)
        return image
Centering objects
Text in our example is drawn from left (X = 0):
So how do we center it? If the image is 100px wide and the text line takes 50px then we have to start drawing it at 25px from the left so it will then appear centered: (100px - 50px) / 2.
We have to take the text line width and calculate the X-axis starting point:
for row, line in enumerate(text_lines):
        row_height = row * text_height
        line_width, _ = draw_canvas.textsize(line, font=font)
        left = (image_width - line_width) / 2
        draw_canvas.text((left, row_height), line, fill=text_color, font=font)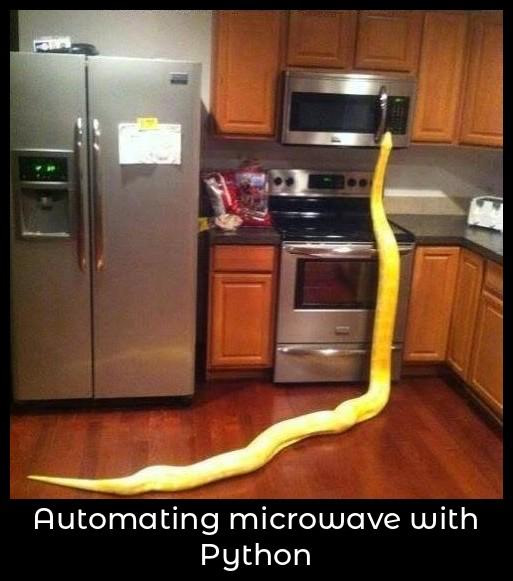
The same approach would be used if you would want to paste an image centered - you get both image widths through the size
property and do the same calculations.
Testing
If you keep your image processing logic in small functions working on the Pillow image objects then you should be able to test the code rather easily - test can create a Pillow image object, then you put it through the function and check the output - like for example for size or check colors of specific pixels (like you take a white image, a pink image and you paste them one below other). This solution requires no local image files to run.
Meme generator prototype
The full code of the meme generator looks like so:
import PIL.Image

import drawings


class MemeGenerator:
    BACKGROUND_COLOR = 'black'
    TEXT_COLOR = 'white'

    def __init__(self, image_path, caption):
        self.image_path = image_path
        self.caption = caption

    def generate(self):
        image = self._get_image_object()
        text_image = drawings.get_text_as_image(
            self.caption, text_color=self.TEXT_COLOR, text_size=30, image_width=image.size[0],
            background_color=self.BACKGROUND_COLOR)
        image = drawings.bottom_expand_image_with_image(image, text_image, background_color=self.BACKGROUND_COLOR)
        image = drawings.draw_border(image, border_size=10, border_color=self.BACKGROUND_COLOR)
        return image

    def _get_image_object(self):
        return PIL.Image.open(self.image_path)


image_object = MemeGenerator('./base_image.jpg', 'Automating microwave with Python').generate()
image_object.save('result2.jpg', quality=90)
And drawings.py:
import os
import textwrap

import PIL.Image
import PIL.ImageDraw
import PIL.ImageFont


def draw_border(image, border_size, border_color):
    original_width, original_height = image.size
    width = original_width + border_size * 2
    height = original_height + border_size * 2
    border_canvas = PIL.Image.new('RGB', (width, height), border_color)
    border_canvas.paste(image, (border_size, border_size))
    return border_canvas


def get_text_as_image(text, text_color, text_size, image_width, background_color):
    placeholder = PIL.Image.new('RGB', (0, 0), background_color)
    font = get_font(size=text_size)
    draw_canvas = PIL.ImageDraw.Draw(placeholder)
    text_width, text_height = draw_canvas.textsize(text, font=font)
    if text_width > image_width:
        character_width = text_width / len(text)
        max_characters_count = int(image_width / character_width)
        text_lines = wrap_text(text, wrap_width=max_characters_count)
    else:
        text_lines = [text]

    total_text_height = len(text_lines) * text_height
    image = PIL.Image.new('RGB', (image_width, total_text_height), background_color)
    draw_canvas = PIL.ImageDraw.Draw(image)

    for row, line in enumerate(text_lines):
        row_height = row * text_height
        line_width, _ = draw_canvas.textsize(line, font=font)
        left = (image_width - line_width) / 2
        draw_canvas.text((left, row_height), line, fill=text_color, font=font)
    return image


def bottom_expand_image_with_image(image, expand_image, background_color):
    width = image.size[0]
    height = image.size[1] + expand_image.size[1]
    expand_canvas = PIL.Image.new('RGB', (width, height), background_color)
    expand_canvas.paste(image, (0, 0))
    expand_canvas.paste(expand_image, (0, image.size[1]))
    return expand_canvas


def wrap_text(text, wrap_width):
    wrapper = textwrap.TextWrapper(width=wrap_width)
    return wrapper.wrap(text)


def get_font(size):
    path = os.path.join('./font.otf')
    return PIL.ImageFont.truetype(path, size=size)
From things that could be added:
- Image resizing
- Adding a logo/name of the site when used on a website
- Parametrising more elements to allow users to select the font and color palette of the meme.
Infographics and RGBA
Aside from memes we can do way more with Pillow. Infographics, banners, article cover images, and more. The meme generator operated on RGB images, intended to be saved as JPEG and containing a typical image. An infographic can work with pure text and colors to create a PNG image without the JPEG compression artifacts. Banners or other promotional images can be somewhere in-between. You take an image but you convert it to RGBA and for example, apply semi-transparent background color on top of it and then write text on it to then save it either as a smaller JPEG or a bigger but artifact-free PNG (or WebP).
RGB is just a red, green, and blue value for a pixel, while RGBA adds also an alpha channel - this channel controls the opacity. So with some clever image manipulations, you can programmatically generate really good-looking images.
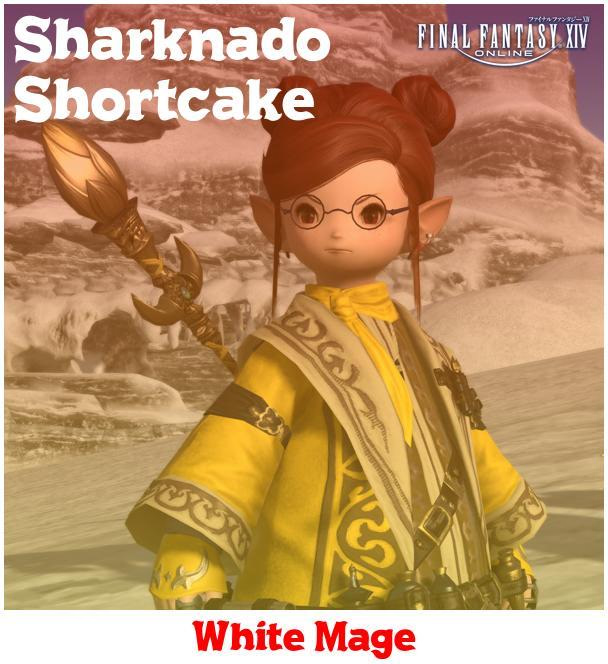
So let's take a screenshot from a game and try to make something like a character plate out of it:
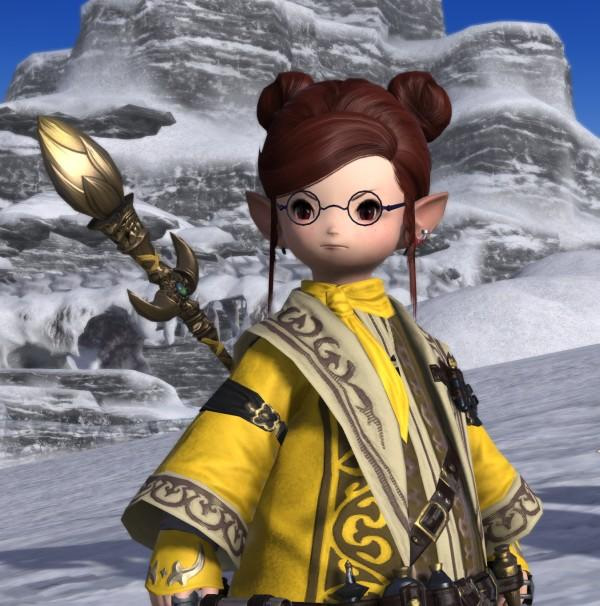
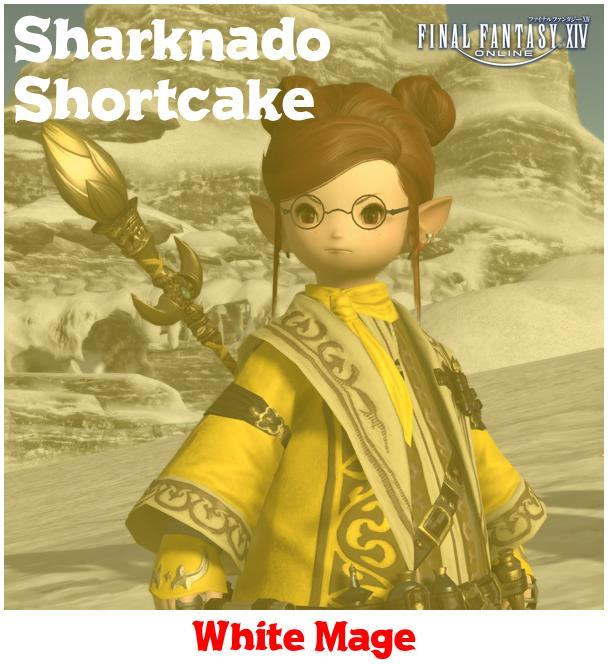
So the generator would look like so:
import PIL.Image

import drawings


class AdventurePlateGenerator:
    OVERLAY_COLOR = 249, 212, 35, 104
    BORDER_COLOR = 'white'

    def __init__(self):
        self.image_path = './bg.png'
        self.character_name = 'Sharknado Shortcake'
        self.main_job_name = 'White Mage'

    def generate(self):
        image = self._get_image_object()
        image = drawings.resize_image(image, size=(600, 900))
        image = drawings.apply_overlay_color(image, self.OVERLAY_COLOR)
        logo = self._get_game_logo()
        image = drawings.paste_game_logo(image, logo)
        image = drawings.write_character_name(image, self.character_name)
        footer = drawings.create_job_footer(job_name=self.main_job_name)
        image = drawings.bottom_expand_image_with_image(image, footer, 'white')
        image = drawings.draw_border(image, border_size=4, border_color=self.BORDER_COLOR)
        return image

    def _get_image_object(self):
        return PIL.Image.open(self.image_path)

    def _get_game_logo(self):
        return PIL.Image.open('./logo.png')


image_object = AdventurePlateGenerator().generate()
image_object = image_object.convert('RGB')
image_object.save('plate.jpg')
And new drawing functions would be:
def resize_image(image, size):
    image.thumbnail(size)
    return image


def apply_overlay_color(image, color):
    overlay = PIL.Image.new('RGBA', image.size, color)
    image.paste(overlay, (0, 0), overlay)
    return image


def paste_game_logo(image, logo):
    logo = resize_image(logo, (200, 100))
    x = image.size[0] - logo.size[0]
    y_padding = 10
    image.paste(logo, (x, y_padding), logo)
    return image


def write_character_name(image, name):
    font_size = 60
    padding = 10
    name_parts = name.split(' ')
    draw_canvas = PIL.ImageDraw.Draw(image)
    font = get_font(font_size)
    for index, part in enumerate(name_parts):
        y = index * font_size + padding
        draw_canvas.text((10, y), part, fill='white', font=font)
    return image


def create_job_footer(job_name):
    placeholder = PIL.Image.new('RGBA', (0, 0), (255, 255, 255, 255))
    draw_canvas = PIL.ImageDraw.Draw(placeholder)
    font = get_font(40)
    text_width, text_height = draw_canvas.textsize(job_name, font=font)

    padding = 10
    canvas = PIL.Image.new('RGBA', (text_width, text_height + padding), (255, 255, 255, 255))
    draw_canvas = PIL.ImageDraw.Draw(canvas)
    draw_canvas.text((0, padding), job_name, fill='red', font=font)
    return canvas
I've changed the font file for this one, as well as centered the image in bottom_expand_image_with_image
but aside from that, it should be the same.
This is way from finished. As you can see there is a lot of blank space and you would want to add some character info or achievements there. This was done just as a proof-of-concept example of how you can start something like this.
Thumbnail and resize
Pillow has two methods to change the image dimensions. Resize will force the image into given dimensions, breaking its aspect ratio if needed. The thumbnail on the other hand will preserve the aspect ratio and keep the image smaller than the given dimensions.
Opacity
Pillow used 8-bit notation for opacity, the alpha channel value. 2 to the power of 8, but counting from 0. So 0 is transparent and 255 is solid. Anything in-between is partial transparency.
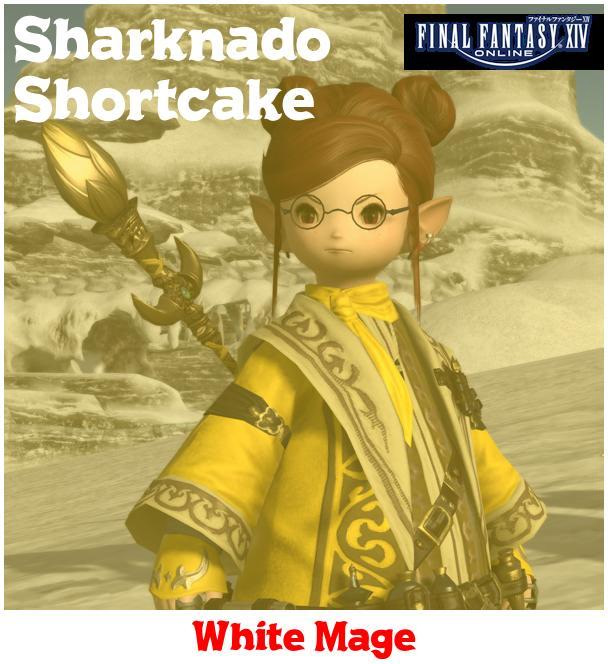
An overlay color or gradients are often used to apply some sort of predictable colors to a dynamic background image so that so it's easier to select text color and get a good contrast for it. The (249, 212, 35, 104) color used in the example is bright yellow with 40% opacity.
When pasting images with transparent or semi-transparent elements you may also want to use it as a mask so that so transparency gets handled correctly:
Gradient overlay
Aside from using one color as a semitransparent overlay we can use two in a gradient. Simple implementation would be for top-bottom gradient:
def apply_gradient(image, color_a, color_b):
    base = PIL.Image.new('RGBA', image.size, color_a)
    top = PIL.Image.new('RGBA', image.size, color_b)
    mask = PIL.Image.new('L', image.size)
    mask_data = []
    for y in range(image.size[1]):
        mask_data.extend([int(255 * (y / image.size[1]))] * image.size[0])
    mask.putdata(mask_data)
    base.paste(top, (0, 0), mask)
    image.paste(base, (0, 0), mask=base)
    return image
And you should be able to google way more examples of gradients or effects, like say pasting an image in a circular mask and more.
Infographics example
My recent usage of Pillow was to generate rating statistics infographics for venues in Social WiFi. It uses a similar code to the examples above. Handy thing is that a venue has already defined style with background image, logo, and colors, including overlay colors for web template purposes. So re-using it for graphics I was able to create a venue branded graphics. Here are some examples:

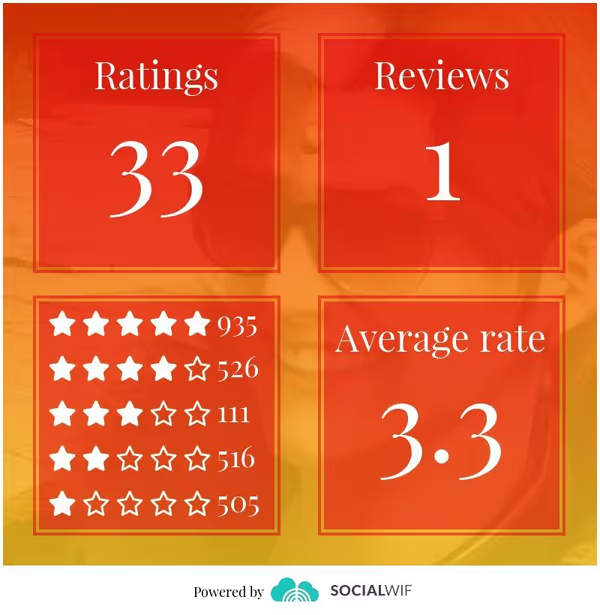
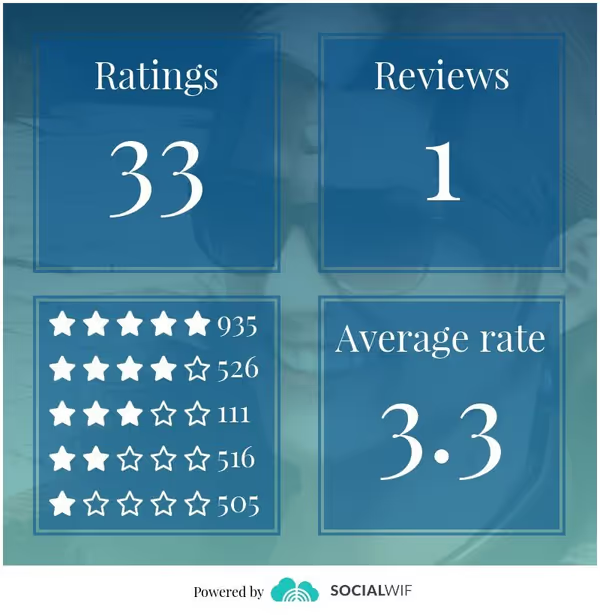
There is support for a few formats (square, horizontal, vertical with venue logo) plus support for venue styles or custom, pre-defined styles. Social WiFi customers can generate such images and share them on their social media or embed them on a website. It can be used to show service value to the customer but also by the customer to show positive ratings, the quality of their venue, and attract additional customers.
Comment article