Astrophotography acquisition and processing in Nebulosity
Nebulosity is an application for astrophotography - image acquisition and processing. It's not free, but it's very easy to use, and supports various cameras (Atik, QHY, SBIG, SX, FLI, QSI, Meade, Moravian... DSLR). For processing it offers at least full set of "basic" features (stacking with optional rotation or scaling, darks/flats/bias support, hot pixel maps, curves, levels, colour balance etc.). For acquisition it offers very handy and clean user interface.
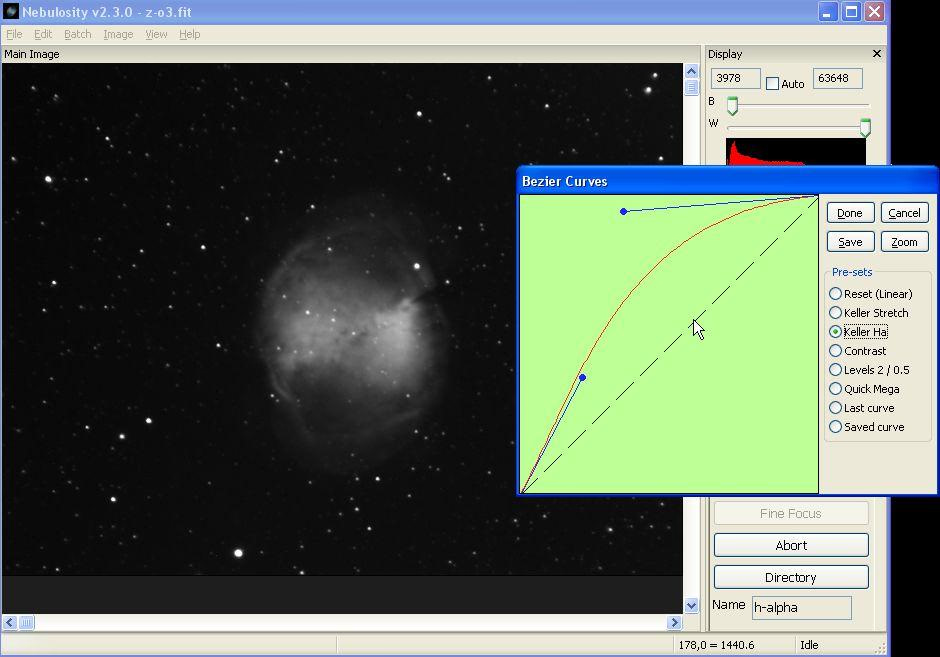
Nebulosity UI - image acquisition
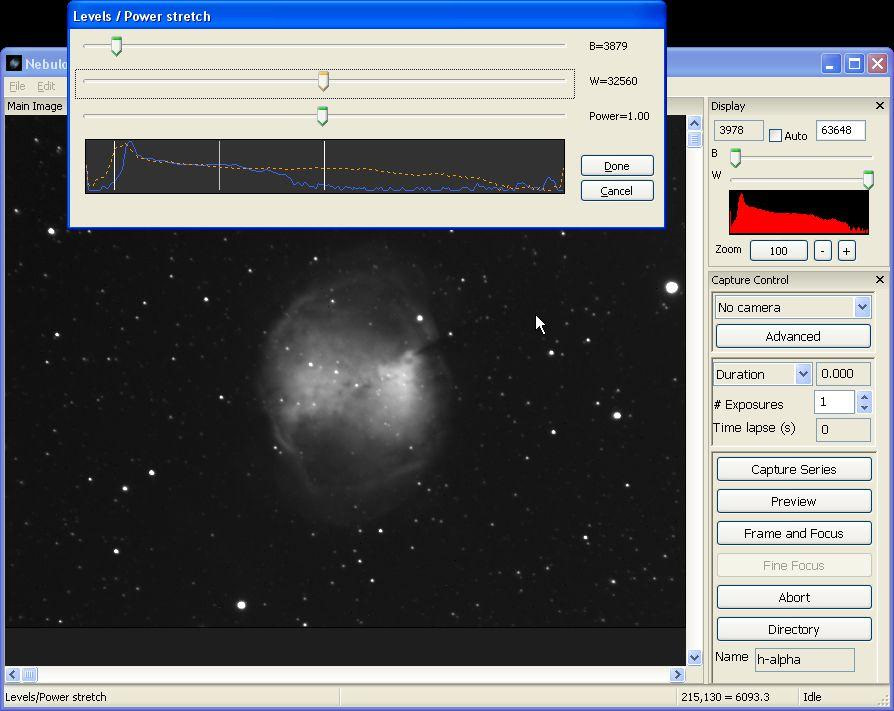
The main window looks like this: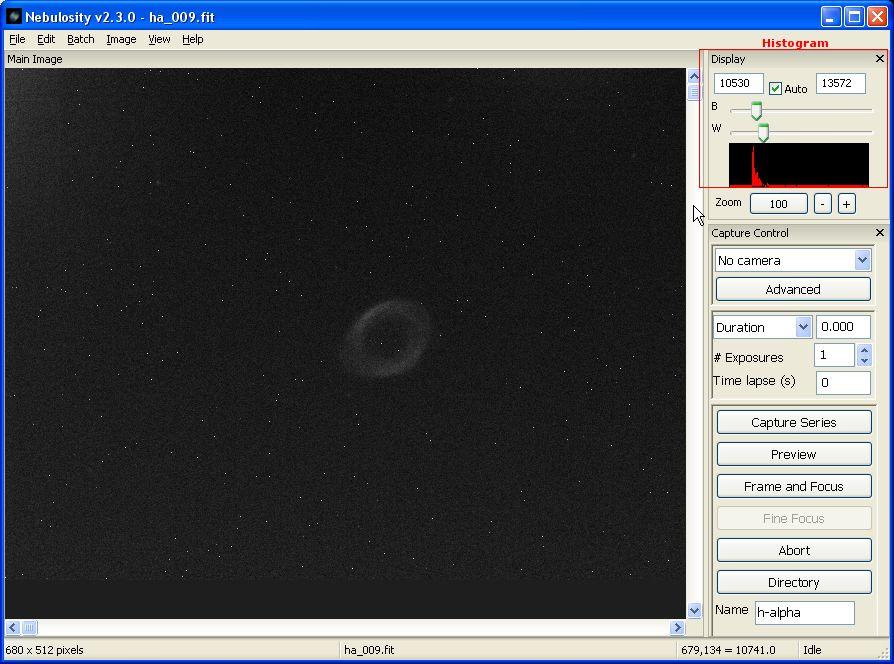
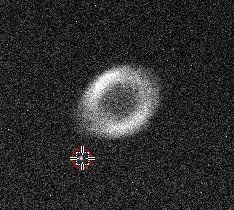
"Display" box shows a histogram of the image. When using Nebulosity you have to look on it often... By default the Auto is checked and on the viewed image histogram will be cut to the signal level. This may surprise new users. Image at short exposure may look "bright", while the histogram is barely filled. If you disable the auto the histogram won't be cut for the preview (and you will see "real" brightness of the object on the image). Without histogram clipping the M57 frame from the first screenshot looks like so:
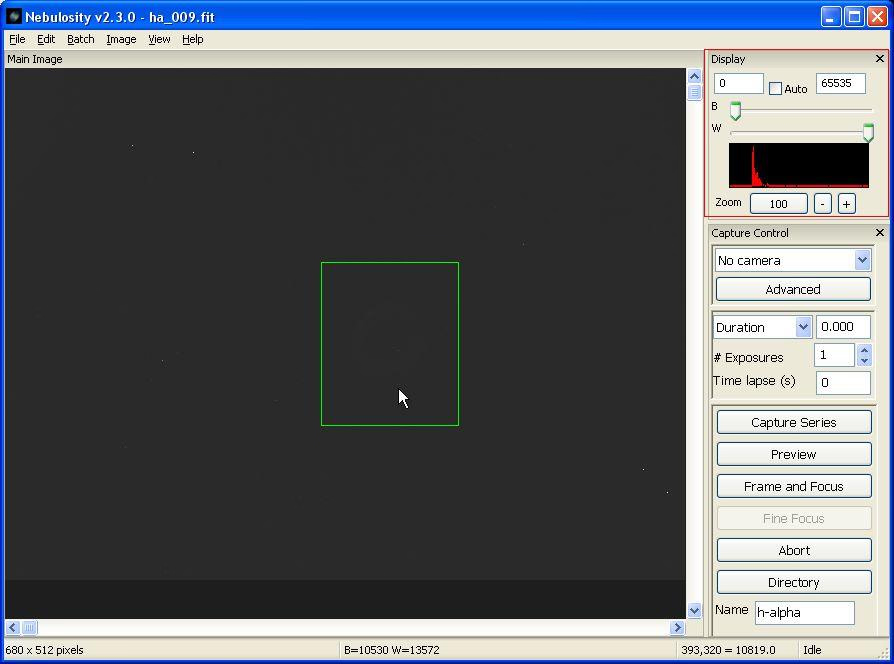
So the frame is underexposed. For 16-bit cameras the signal is saved as a value between 0 (black, no signal) and 65535 (white). When setting exposure time it's good to get as high histogram fill as possible (brightest objects close to the max value).
Below "Display" you will find "Capture Control" that handles camera settings - type, gain, offset, exposure time. Advanced button will allow modifying additional settings (like binning). Things like cooling may be set from the top menu ("Edit" -> "Preferences").
On the bottom of the column you will find few more buttons:- Directory - choose a folder to which images will be saved.
- Preview - do one exposure and show it.
- Frame and Focus - shows a binned fast preview for focusing.
- Capture Series - starts the planned imaging run (exposure time and frames quantity to capture).
Processing raw frames
For processing the camera settings are of no meaning, but still - look at the histogram (and auto-clip checkbox). All the processing functions are in Batch and Image top menus.
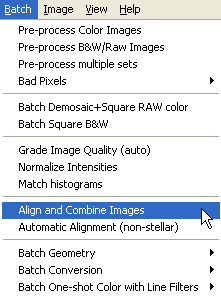
- Pre-proces Color/BW Images - dark/flat/bias support for colour and mono images.
- Bad Pixels - create bad pixels map and remove then from frames
- Align and Combine Images - various stacking options
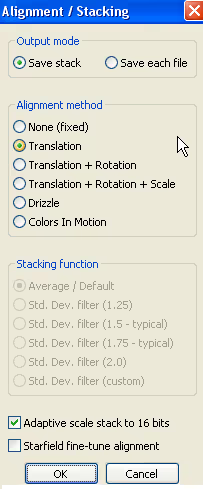
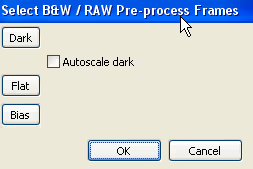
For stacking we need frames that have been "processed by" dark/flat/bias frames (if needed). To do that we have to stack and execute those frames before stacking the object frames. Stack dark/flat/bias frames with "None" alignment and then open "Pre-proces Color or BW Images". A window will show up asking to choose some of those special frames. When you select them you will be able to select raw frames on which they will be executed:

Processing stacked images
When you have the final stack of the astrophotograph you can process it with tools available in Image menu: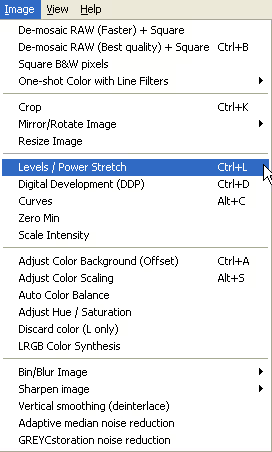
Adaptive Median Noise Reduction may be used to limit the grainy noise. Deinterlace will be handy for removing interlacing given by interlaced CCD sensors (DSI II, QHY6, 6 Pro, Brightstar Lyuba 429 and others).
Creating RGB and LRGB images
To make a colour image out of monochrome R,G,B (or other) channels you need to process images for every channel. Then align them against each other ("save each file" in stacking window). After that from Image you can choose LRGB colour Synthesis. In the window you will be able to choose frames for RGB and optionally L channels.
Generated colour image may require colour balancing. Quickest and automatic path is to use Adjust Color Background and then Auto Color Balance.
Comment article