Powerful modern imaging sets for planetary, lunar and solar imaging
Imaging sensors are quickly evolving to provide better and better performance for demanding markets. Thanks to that evolution planetary, Lunar and Solar imaging is able to do better and better images or to do images never ever possible before. Last year was the year of a total domination of Sony ICX618 in the planetary imaging. A successor to the old ICX098 used in Philips webcams and older planetary cameras. It offers much higher sensitivity and better speed performance. In the category of Lunar and Solar imaging there is no dominant sensor, but Sony ICX445 is taking the lead. It offers better sensitivity than competing ICX204/205/274 - especially in infrared which is imported for H-alpha solar imaging.
Taking in mind the latest cameras and accessories, here are my propositions for effective Solar System imaging setups.


Point Grey Chameleon versus TIS DMK, DBK, DFK21AU618
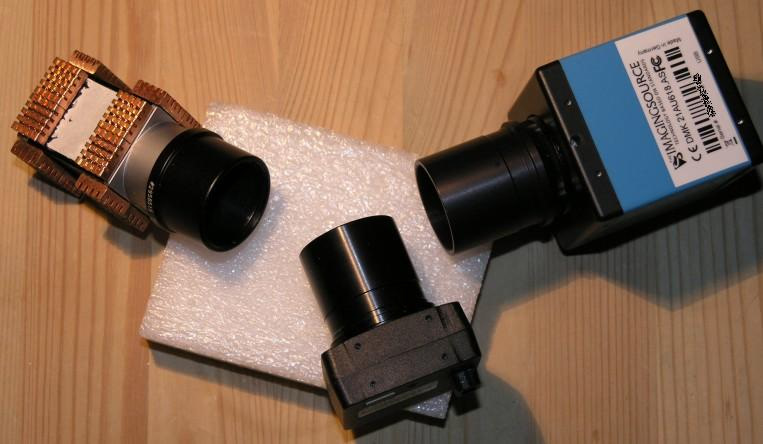
Mass demand (and user migration) made TIS to reconsider and release the ICX618 version of their planetary cameras. Now they are selling like crazy and are probably the best planetary cameras. There are three versions of them - DFK21AU618 (color with IR/UV cut), DBK21AU618 (color without filter) and DMK21AU618 (mono). This line is also free of circular artifacts that show up on max shutter in older TIS cameras (this problem is actually very common and affects most of Sony CCD machine vision cameras of older design).
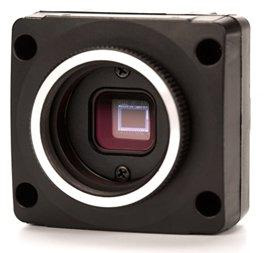
Point Grey Chameleon is quite new camera on the market. It's equipped with ICX445 sensor, which has more pixel than ICX618 and thus it's better for the Moon and Sun. The sensitivity is better than ICX204, 205, or 274, but the diagonal is just 1/3". 18 FPS at full frame, more with ROI, and around 30 FPS at bin2 - so can be good for planets but not as fast as D*K21AU618. It's already in use for solar and lunar imaging, but you will find some planetary images too.
Which one to choose? If you want more planets then DMK/DBK/DFK, if you want more Moon and Sun or something flexible - Chameleon. Depending on your location the prices for both cameras may be quite close. TIS camera with ICX445 should also show up - keep an eye on their announcements.
Color or monochrome? This is a tricky question. With color camera you can easily/quicker get a color image. With mono it's easier to get better images using a set of filters and more processing. Mono will also be better for Moon or the Sun. It's all up to you to choose how much time and effort you want to spent for this.
Where to buy?
Point Grey Chameleon cameras are available in ptgreystore.com (USA). In Europe they are also sold by astromarket.pl and shop.tecnosky.it. Mass orders (for better prices or for... astro shops) are handled by ptgrey.com. Both mono and color Chameleon is priced at $375 in the US for a single unit order. In Europe it goes up to 400-440 EUR.
TIS cameras are available in most astronomical shops. Just look at the full name to find the new cameras - "AU618" for the new line (check the description too). As TIS is within the EU their cameras in USA will cost more than local Chameleon. In Europe the prices are nearly equal.
Note also that to use Chameleon you will also need a C/CS to 1,25" nosepiece (from astro shops) and a USB A - Mini B cable. In case of TIS cameras you have that in the box with the camera (nosepice and matching USB cable).
Imaging Sets
Mono camera starter kit

- Chameleon mono + nosepiece + USB cable / DMK21AU618
- Red #25 visual filter or similar: Baader, GSO, Lumicon... cheap
In this starter kit you won't make color images, but just mono. The red visual filter (or similar - dark red, orange, or much darker - Baader IR-Pass, Astronomik ProPlanet) will limit the bad effect of seeing and dispersion on your images - so you can shoot better images and master processing on good stacks.
Mono camera complete kit

- Chameleon mono + nosepiece + USB cable / DMK21AU618
- Manual 1,25" filter wheel: Brightstar (Orion in US) or alike - keep it cheap but take something that has a current filter marker like those listed here
- RGB imaging filters: Baader amateur set (very entry level), QHY LRGB set (better), or best: Astronomik and Baader LRGB sets
- Extra luminance filters - visual red or alike
To get a color picture with a mono camera you need RGB filters. Better filters cost more but they also give better transmittance (less light is lost). The extra luminance filter as described in the starter kit can be used to shoot a sharp image when the seeing is bad and apply it as a luminance in a LRGB image. It will also be good for Moon imaging. If you choose the Baader amateur set - the red filter from that set can be used as the visual red filter for luminance images (without IR/UV cut filter).
Used equipment: LRGB filters and filter wheels often show up in the classifieds and are cheaper than the new ones straight from the shop.
Color camera kit

- Chameleon color + nosepiece + USB cable / DBK/DFK 21AU618
- Optional yellow #12 or brighter visual filter: works as minus blue for very low objects like Saturn in some places - read below.
- IR/UV Cut Filter: to get proper color balance
DFK camera have a IR/UV cut filter built in. Chameleon also has some sort of IR blocker built in (didn't saw any specs). They don't need the additional IR/UV cut filter. DBK needs it as it doesn't have such filter built in. Without IR block the color would be more reddish due to infrared adding signal to red pixels. UV also could create a fuzzy haze around the planet.
What's with the yellow filter? That's my cheap solution to Saturn being low on the sky for northern hemisphere. Saturn images will show strong red-blue edge coloration. That's the effect of atmospheric dispersion - big amount of air defocus some wavelengths more than others (blue most, red/ir least). For a color camera it means blurred image. With a yellow filter the most dispersed blue wavelengths are gone and the dispersion is limited allowing sharper images to be taken (although the color balance will be changed noticeably). DBK will perform best as it will also use infrared wavelengths with such filter.
There are other hacks for improving the image from a color camera. Mono cams can do that easily (their advantage), but with some "hacking" color cams can do some magic too. For example you can record a normal color avi with an IR/UV cut filter and then record another one with red visual filter - stack it, debayer (make it color if it's not) and extract only red channel from it and use it as a luminance for that color image... a lot of processing fun ;)
Extra accessories
You need a scope and depending on it focal ratio - a Barlow/Powermate to get optimal f-ratio for the camera. DBK/DFK/DMK21AU618 like f/20-30 (30 at very good seeing), while Chameleon having smaller pixels something from f/10-20. Powermates aren't required. Good 3-element APO Barlow will do the same work as Powermate.
Atmospheric dispersion correctors are the ultimate and the most powerful tools a planetary imager can use to improve his/her images (except using Hubble). This corrector reverse atmospheric dispersion - canceling it for all wavelengths (so you don't need to play with yellow filters etc.). For color cameras it allows you to take non-blurred images, and for mono it allows true sharp LRGB images to be taken (with the L - IR/UV cut filter or other broad filters like yellow, orange visual longpass filters). The only problem is that they aren't cheap and start from 300 EUR - Astro Systems Holland or pierre-astro.com.
Cheap cameras
Cameras I described above aren't very cheap and not everyone may want to buy such expensive piece of equipment. There are cheaper cameras with performance matching their price. Some are more expensive, some less - and became a good bargain.
Planetary imaging starts with webcams - old Philips SPC880/900NC or modern MS Lifecam Cinema or Studio. Webcams are very cheap. Between webcams and power-cameras there are few solid budget cameras you may also consider. Camera performance rises (somewhat) with the price.
First in line are QHY5 and QHY5v guide cameras. They are equipped with CMOS sensors (quite good sensitivity in mono, the 5v is better due to global shutter but has less pixels) and widely available, even in classifieds. The drawback - limited software support (QGVideo, but if you are lucky it should work with SharpCap too) and noisy sensors. Point Grey Firefly MV 0.3 MP is similar to QHY5v - a global shuttered CMOS sensor and is priced at $275. On the other hand - it wasn't used in astrophotography yet. In Europe you can look at DMK72 - a machine vision camera made by TIS. It has a rolling shuttered CMOS sensor (like QHY5) and a lot of pixels that can either do big frames slowly or small frames quickly (for planets). The disadvantage - rolling shutter usually doesn't work good if the seeing is bad and imaged object shakes/moves a lot (reported to be easily visible for solar imaging). But it's cheap. The same apply to newer CMOS designs with rolling shutters - they may have less fixed pattern noise, but the rolling shutter may still be a problem (IMX035 in QHY 132E, Firefly MV 1.3 MP). French iNova cameras got cheaper lately too - especially the older models with ICX098 sensors.

Used equipment: QHY5 and QHY5v are the most obvious. You may also find older TIS DMK/DBK/DFK cameras there - if the price is noticeably lower than the shop price it may be a good bargain (but note the circular artifacts problem at max shutter speed).
Extreme cameras
Did you notice people using a Flea 3 camera? There is a small problem - not everyone notice that there is a lot of "Flea 3" models. The planetary is only one - equipped with the ICX618 sensor - this one on Firewire 800 - IEEE-1394b. If you look at USB 3 Flea 3 models you will see that there is no such sensor among them - if you want the planetary Flea 3 - choose the right model (although DMK21AU618 will perform nearly as good as Flea 3 with ICX618).
What if you have a bit solar scope and you want to catch the whole Sun in one frame? Check out this table. You may notice Basler Ace cameras with big 1" CMOSIS sensors. That should hit the market somewhere in Q1 2012 (GigE version. The “camera link” models are available from various companies... but camera link isn't laptop friendly). It's a CMOS, but with a global shutter and seems to got a lot of interest on the machine vision market. Tests will show up when the camera will show up... but if you want to be flexible with DS imaging get something like an Atik 4000 (or SBIG with KAI4022) - 16-bit cameras are harder to use for Solar imaging (and quite poor at planetary), but it's doable. Just increase the exposure to fill most of the histogram (80-90%) and shoot 50-100 frames. Before stacking - manually delete those worse frames and it should work even if only few frames get stacked.
Comment article