CloudCannon as headless CMS for static site generators
CloudCannon is a Git-based headless CMS meaning they don't use any own database or integrate with any. What you edit is then committed to your Git repository. The static site generator used still runs and can build the final site.
Git-based headless CMS has the advantage of much smaller vendor lock-in, but it also affects the level of features it can offer. CloudCannon is a sort of web editor for your SSG but also tries to bring editing features for non-technical team members.
I was evaluating tools for a business website I work for where we wanted an option to manage website contents as IT easily but also have marketing/sales have it easier to edit and extend the website, without breaking it and without uploading 3000x3000 logo image as a customer business thumbnail ;)
The basics
CloudCannon is a paid service for the most part starting at $45/month and $10/month for the pay-as-you-go option. You get a 10-day trial and then if you don't pay you get a free personal
feature level which is like no collaborators and one site.
As a developer you will have to check their documentation and guides. The trick is to either mark editable text on your site or make special components the CloudCannon editor can manage in a user-friendly way.
The CMS supports (with some caveats) multiple static site generators:
- 11ty
- Astro
- SvelteKit
- Hugo
- Jekyll
- Nuxt
- Docusaurus
- MkDocs
From this list Hugo, Eleventy, Astro, Jekyll, and SvelteKit support Bookshop components.
To start register and add a site you want to test it on. It doesn't have to be anything production-level. If you want to use a specific SSG then prepare a basic project in Git and follow their starter guide. You can also use one of their pre-made starter projects.
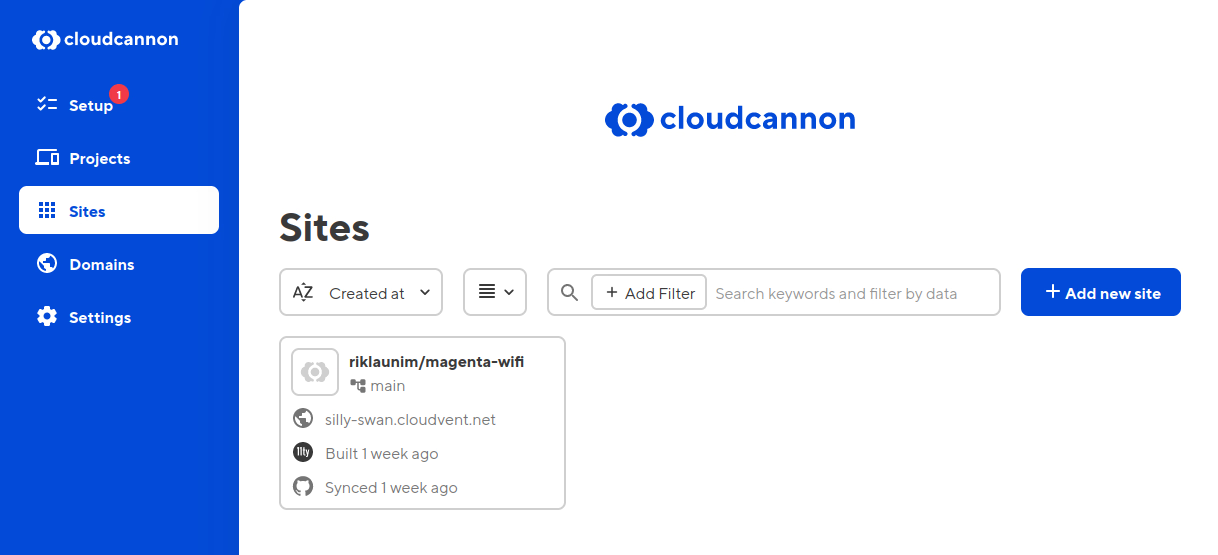
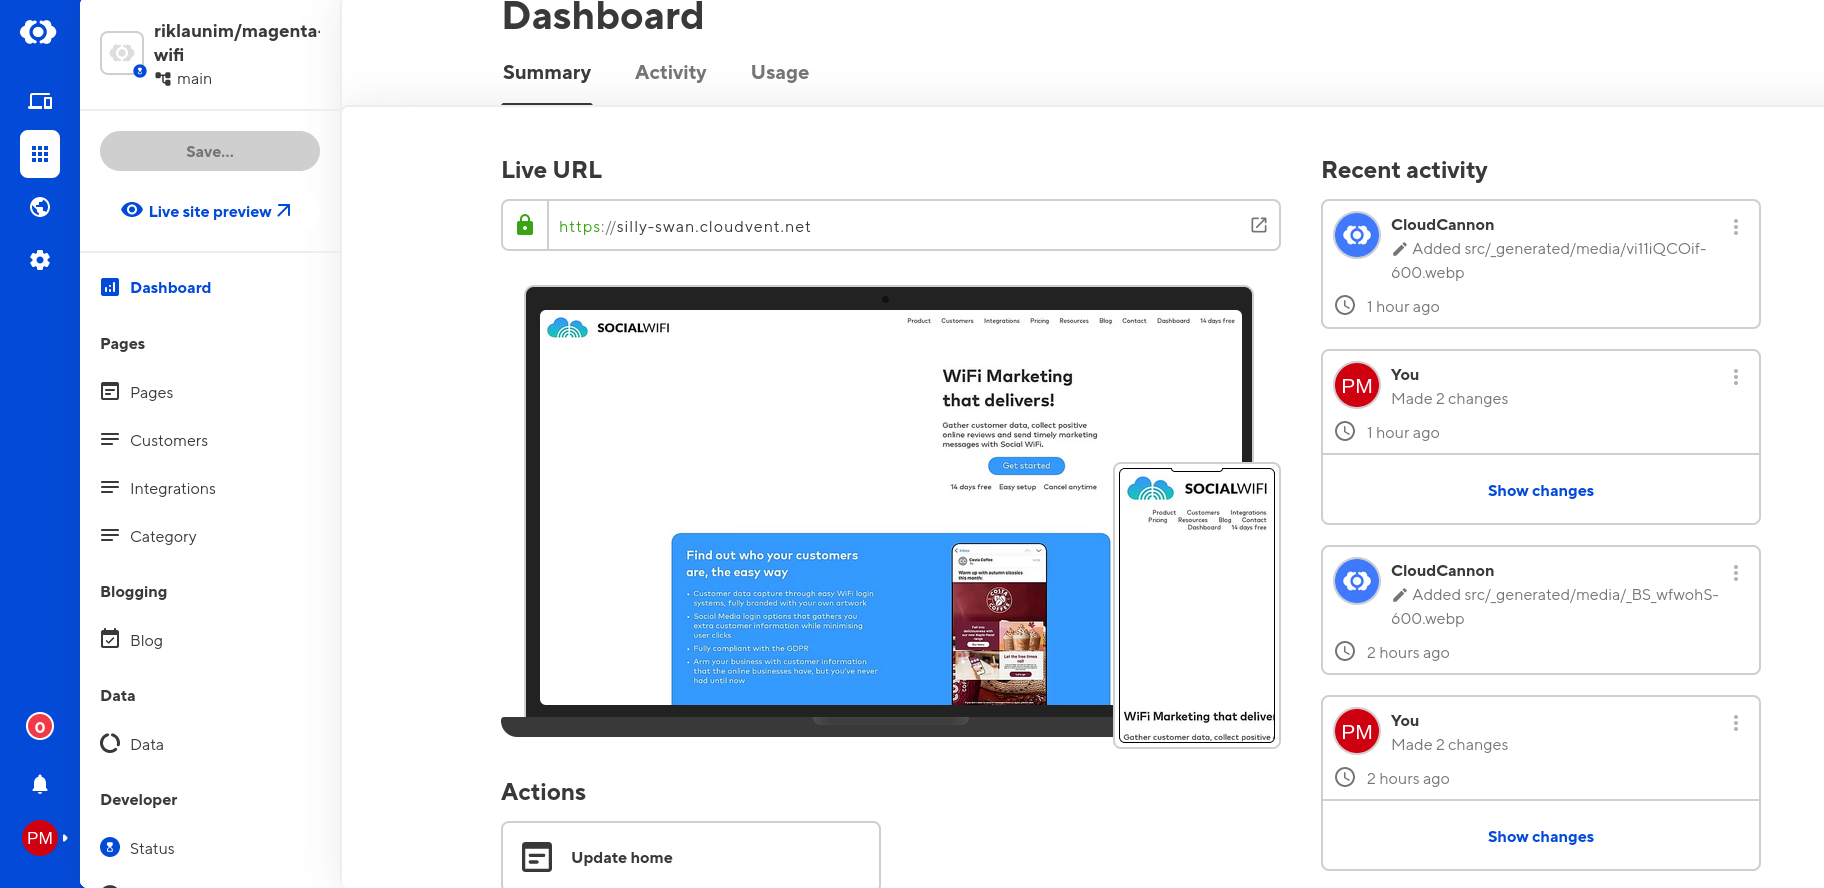
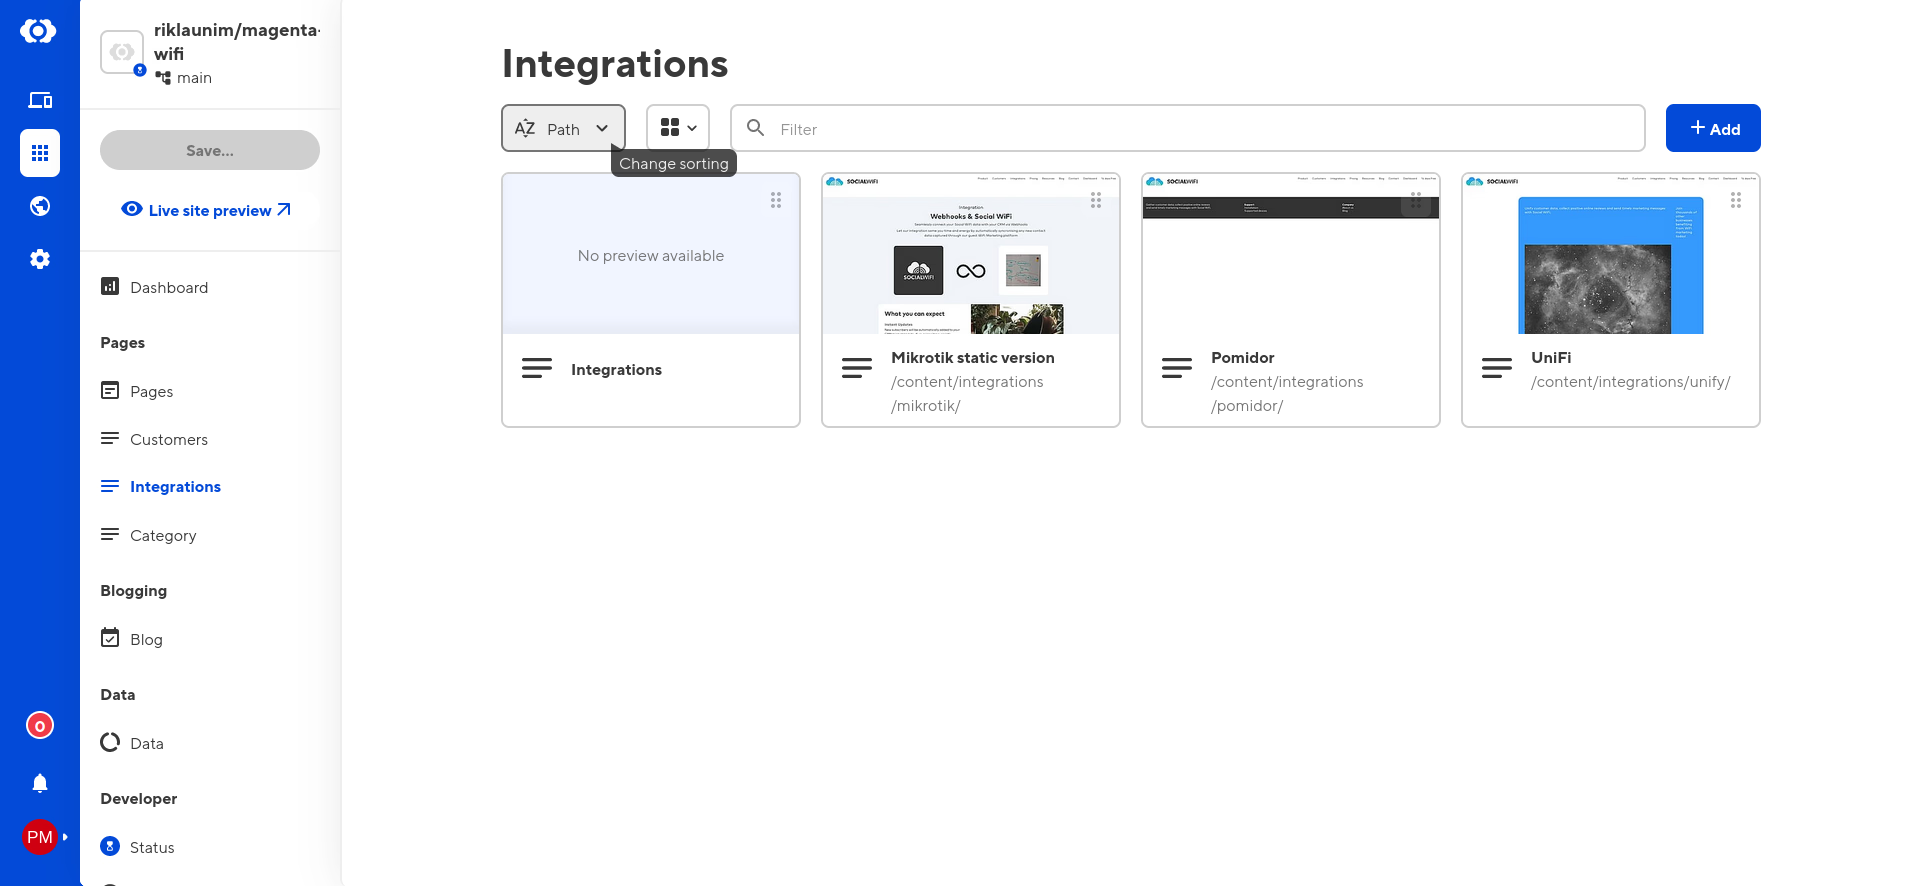
After adding the site you should be able to access the dashboard, manage files, upload media, and stuff like that.
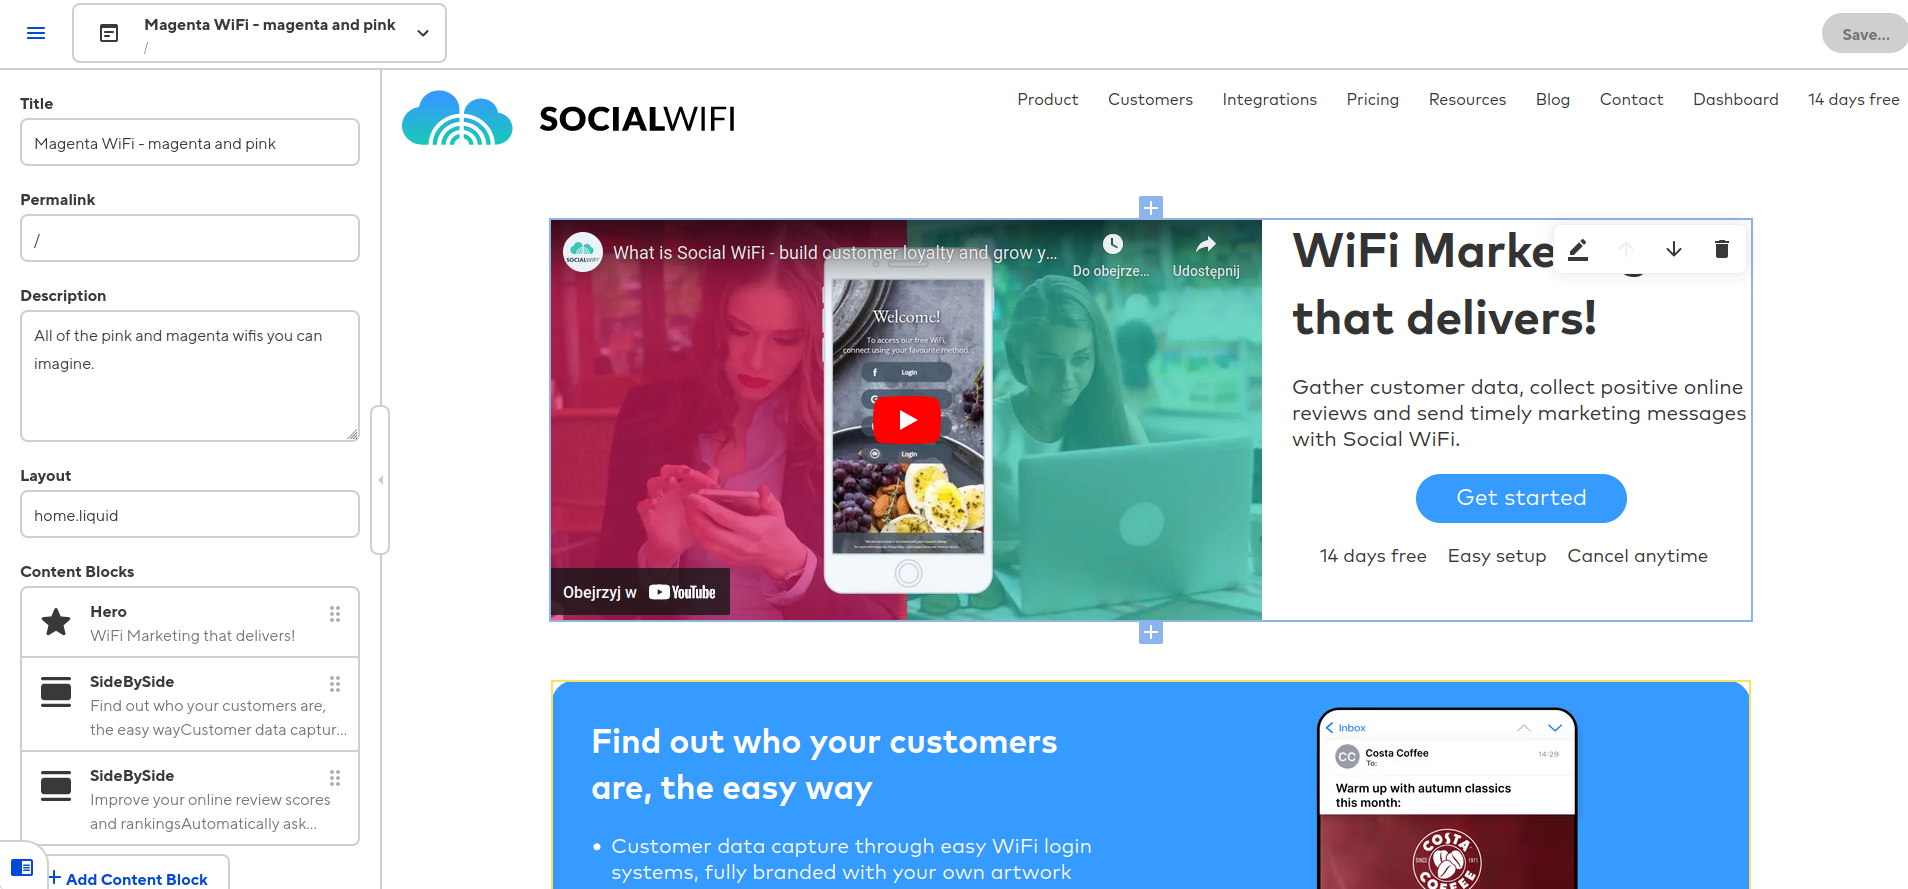
Fixed content editing
Basic usage of CloudCannon editor is to have a fixed element editing. Add editable class to an HTML element you want editable. Note that this is simple inline-editing so no fancy WYSIWYG there:
<div class="integration">
<div class="center">
<div class="headline editable">Integration</div>
<h1 class="editable">Webhooks & Social WiFi</h1>
<p class="editable">Seamlessly connect your Social WiFi data with your CRM via Webhooks</p>
<p class="editable">Let our integration same you time and energy by automatically syncronising any new contact data captured through our guest WiFi Marketing platform</p>
</div>
</div>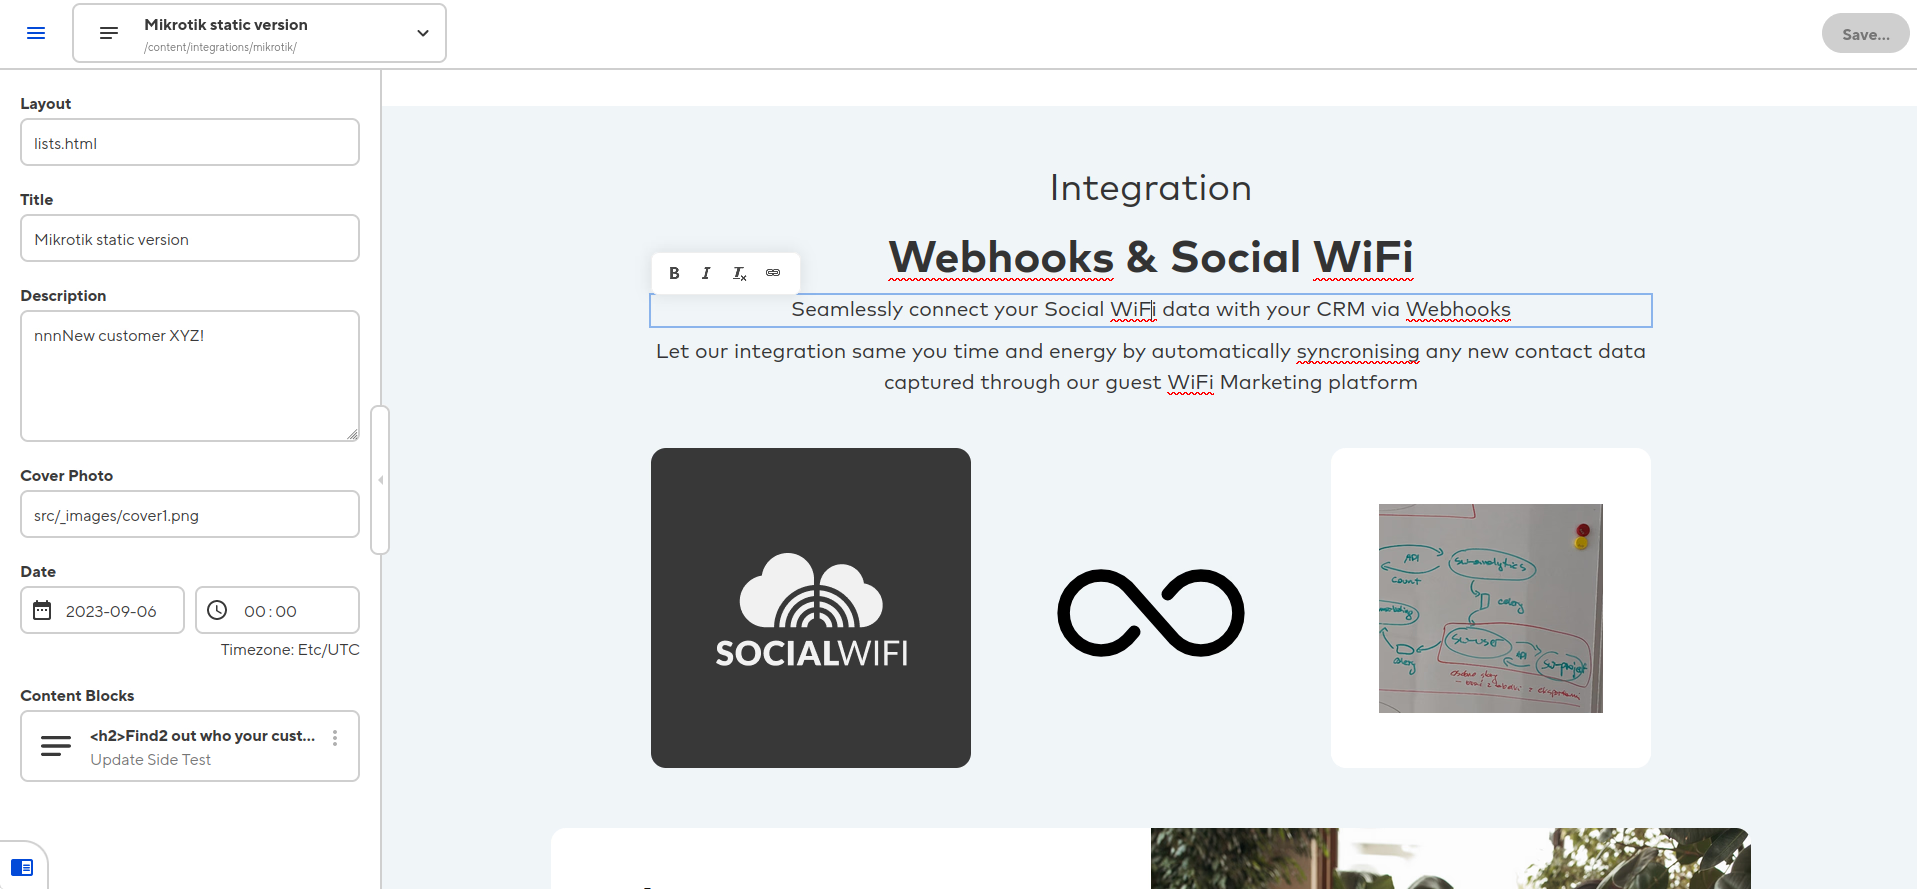
You can't change the content layout (new paragraphs, new widgets, new anything) but you can edit what's already there. This could be useful for pages where you want to maintain a very similar look and feel. Some side text pages cloud apply as well.
Bookshop components
Bookshop components is where it starts as a sort-of headless CMS and page builder. Those components expose a schema for the CloudCannon editor allowing for much fancy editing. For Astro, they are based on Astro components, while for 11ty they are more their own thing. Implementations vary greatly between SSG.
Here I will use 11ty for this showcase. The end result in the CC editor should be the same.
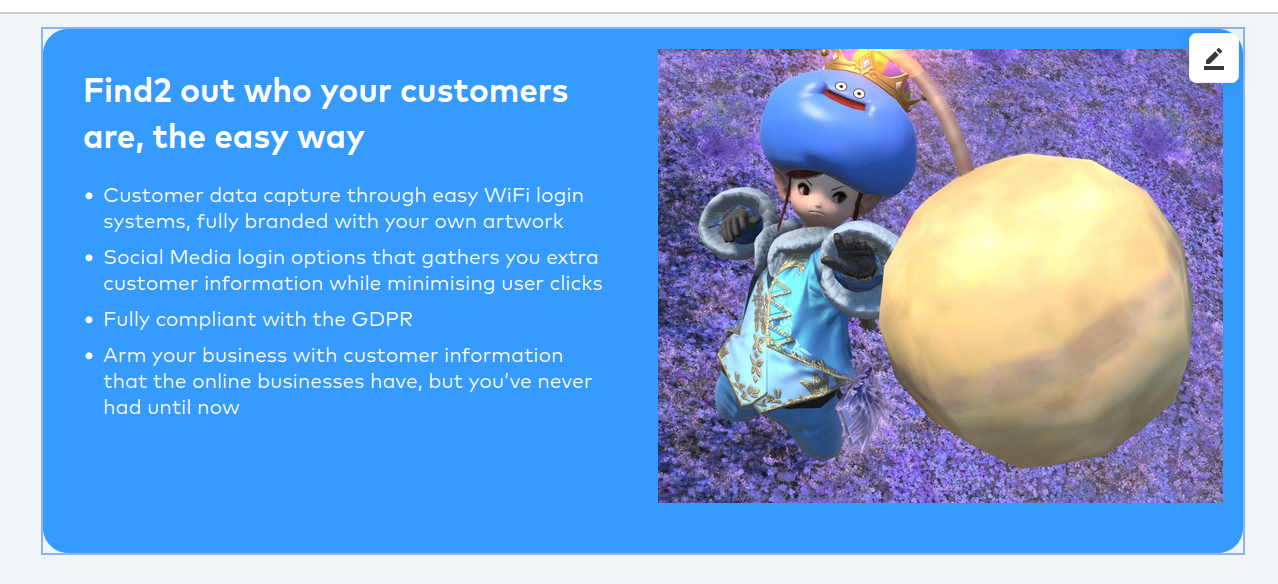
The above example is a for side-by-side
component where we have an image and text in a box. It's common to see such rows on pages where the image and text swap position repeatedly row by row.
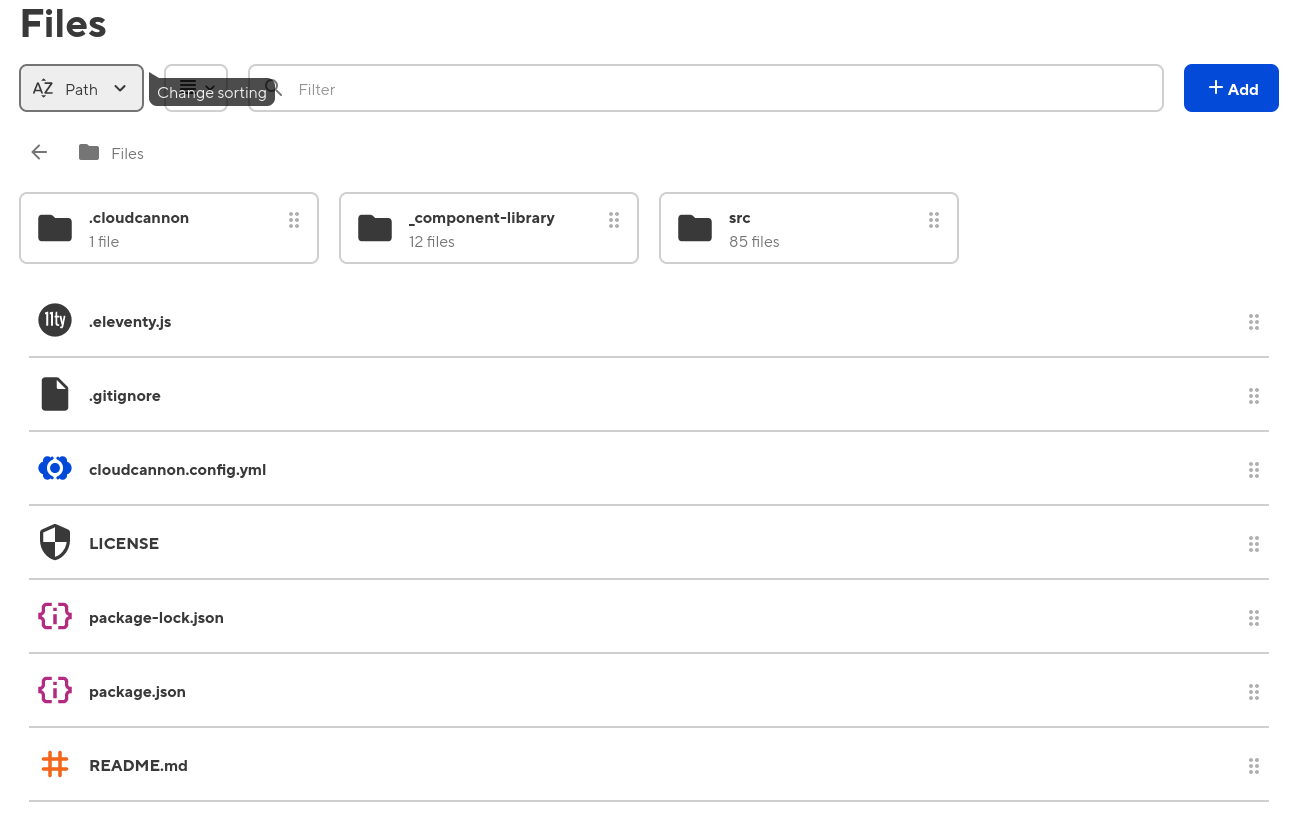
In 11ty Bookshop components would be located in _component-library/components/. Then each component would have 3 files by default:
- component-name.bookshop.yml: configuration file of the component
- component-name.eleventy.liquid: the template, having access to variables defined in the configuration file
- component-name.scss: optional place for your styles specific to the component
11ty can use multiple template engines and CSS handles but CC tends to just use Liquid templates and SCSS.
The YML config file for a side-by-side component can look like so:
spec:
structures:
- content_blocks
label: "SideBySide"
description: text and image side by side simple component
icon: calendar_view_day
tags: []
# Defines the structure of this component, as well as the default values
blueprint:
text: "Hello World!"
image_path: ""
image_alt: ""
side: "left"
# Overrides any fields in the blueprint when viewing this component in the component browser
preview:
# Any extra CloudCannon inputs configuration to apply to the blueprint
_inputs:
text:
type: html
side:
type: select
comment: "Select side used by the text part of the widget"
options:
values:
- "left"
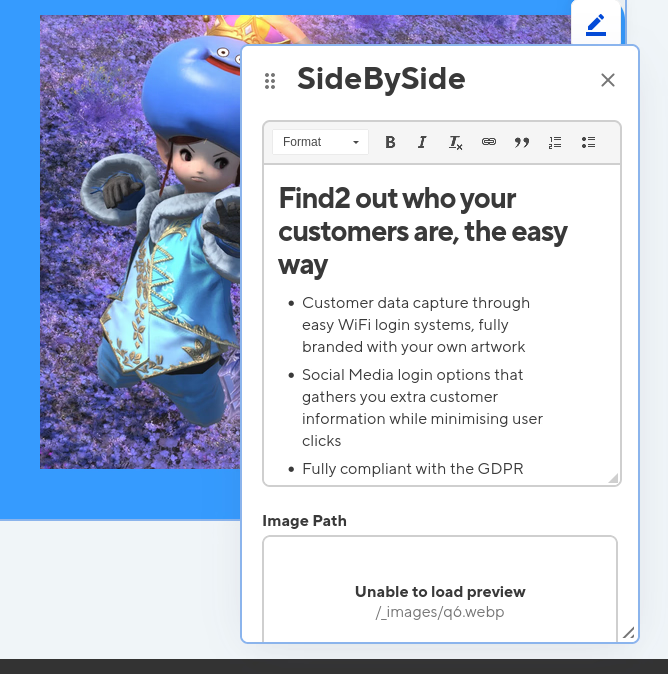
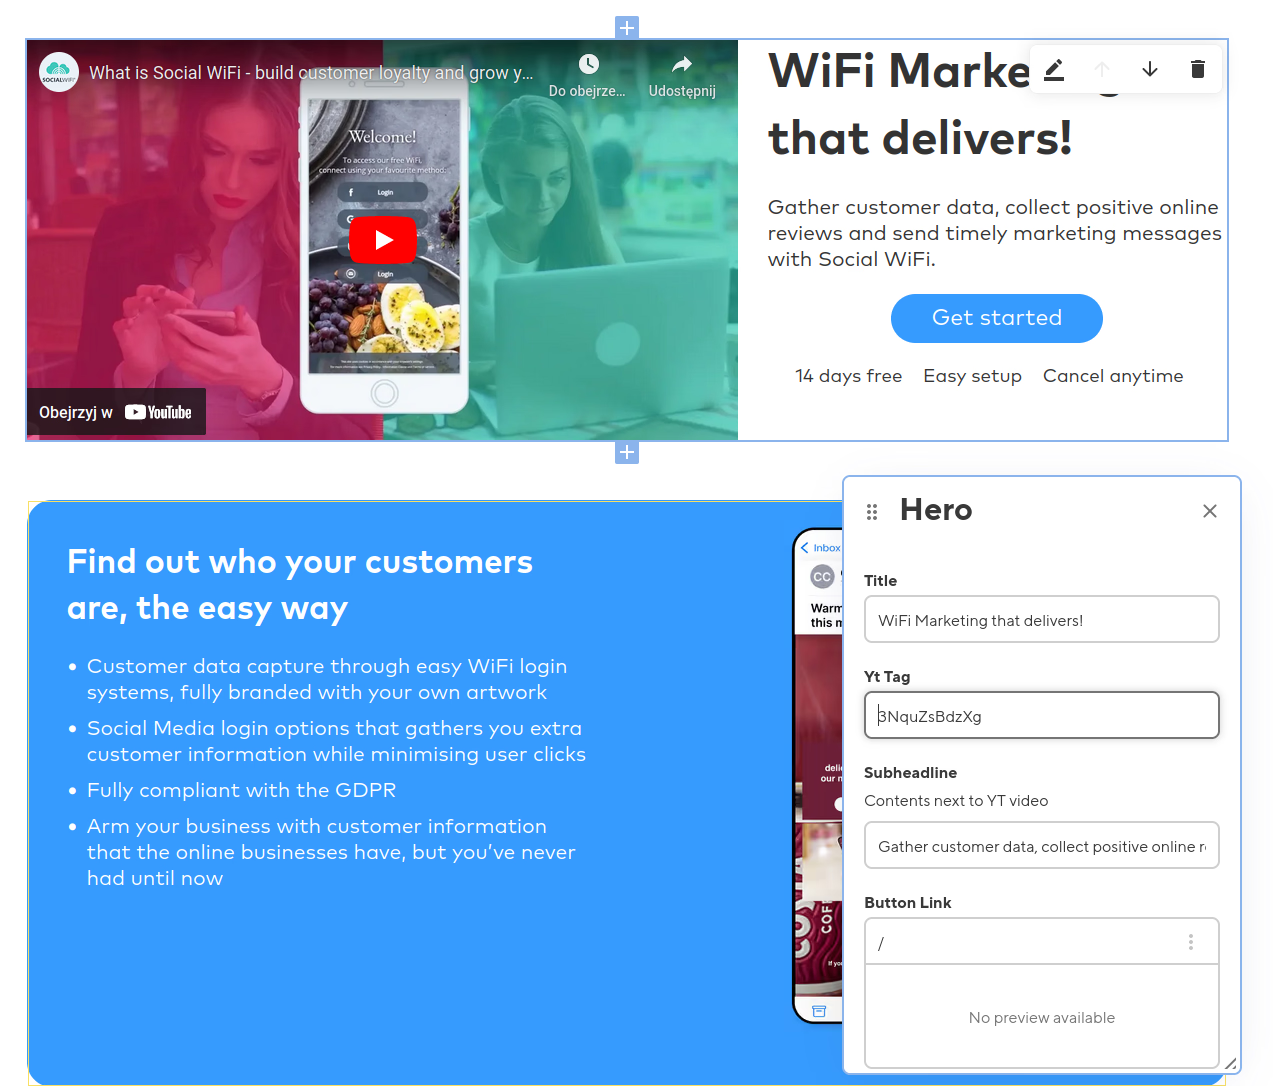
- "right"spec sections define general CC configuration like component name, description, and icon in the editor. blueprint defines the editable variables while _inputs can be used to set specific type/editor widgets.
As such we have text
which we allow to edit as HTML in a WYSIWYG editor. side
is a select that has two values possible - left and right. Image fields could also be hand-configured, but CC recognizes image_path and assigns image file picker/uploader.
The template would look like so:
<div class="c-sideBySide">
    {% if side == 'left' %}
        <section>{{ text }}</section>
<figure>
<img alt="{{image_alt}}" src="{{image_path}}"/>
</figure>
    {% else %}
        <figure>
<img alt="{{image_alt}}" src="{{image_path}}"/>
</figure>
<section>{{ text }}</section>
    {% endif %}
</div>
Could be slightly improved to avoid HTML duplication, but this is for testing out the CC editor.

Using Bookshop components
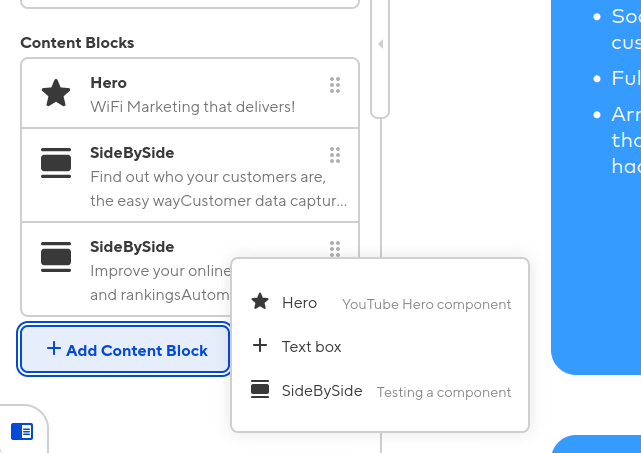
You can use components in two ways. First is fixed placement on a page - you decide which components are where and then in the editor, you can edit them but you can't add more components, change their order, etc.
Second mode, probably more common for page building is building the whole page or its section from components. This allows full control of quantity, order, and type of components in the CC editor.
A fixed placement would look like showcased before. Note that this has to be in a *.liquid file (or configure 11ty to use .html files as liquid templates):
---
layout: my_base_template.html
title: My Page Title
description: Hellow there!
content_blocks:
sideTest:
text: >-
<h2>Find out who your customers are, the easy
way</h2><ul><li>Customer data capture through easy WiFi login
systems, fully branded with your own artwork</li><li>Social Media
login options that gathers you extra customer information while
minimising user clicks</li><li>Fully compliant with the
GDPR</li><li>Arm your business with customer information that the
online businesses have, but you’ve never had until now</li></ul>
image_path: /_images/q6.webp
image_alt: some alt
side: left
---
<div class="integration">
<div class="center">
<div class="headline editable">Integration</div>
<h1 class="editable">Webhooks & Social WiFi</h1>
<p class="editable">Seamlessly connect your Social WiFi data with your CRM via Webhooks</p>
<p class="editable">Let our integration same you time and energy by automatically syncronising any new contact data captured through our guest WiFi Marketing platform</p>
</div>
{% bookshop "sideBySide" bind: content_blocks.sideTest %}
</div>The bookshop tag allows us to invoke a Bookshop component given by name, and after the name we specify the exposed attributes/variables it needs. For 11ty there are few ways to bind component variables to page frontmatter variables. Either you bind the variable to the variable or you bind it to the frontmatter block containing all the variables. Here the component uses frontmatter from content_blocks.sideTest.
The structures block in the component YAML file defines in which frontmatter groups a given component can be used. This is useful and needed when we have pages using a fully editable list of components. A page fully made out of components would pretty much have frontmatter only:
---
title: A fully component based page!
permalink: /
description: Cool stuff with 11ty and CloudCannon
layout: home.liquid
content_blocks:
  - _bookshop_name: hero
    title: WiFi Marketing that delivers!
    yt_tag: 3NquZsBdzXg
    subheadline: >-
      Gather customer data, collect positive online reviews and send timely
      marketing messages with Social WiFi.
    button_link: /
    button_text: Get started
  - _bookshop_name: sideBySide
    text: >-
      <h2>Find out who your customers are, the easy way</h2><ul><li>Customer
      data capture through easy WiFi login systems, fully branded with your own
      artwork</li><li>Social Media login options that gathers you extra customer
      information while minimising user clicks</li><li>Fully compliant with the
      GDPR</li><li>Arm your business with customer information that the online
      businesses have, but you’ve never had until now</li></ul>
    image_path: /media/UkWi6e1fhh-280.avif
    image_alt: some alt
    side: left
  - _bookshop_name: sideBySide
    text: >-
      <h2>Improve your online review scores and
      rankings</h2><ul><li>Automatically ask every customer for a review after
      their visit</li><li>Send branded review requests at the right time for you
      and your business</li><li>Direct positive feedback to one of the online
      review sites most important to you</li><li>Keep negative feedback in house
      and manage any issues privately</li></ul>
    image_path: /_images/a1a.jpg
    image_alt: some alt
    side: right
---
Of course you would not write all of this. This is the output from the CloudCannon editor. You edit, you save and it commits something like this.
What makes the magic happen is the layout file, where it iterates over the list from the frontmatter and invokes every component using bookshop_include:
...
<body>
    {% include "partials/header.html" %}
    <section>
<article>
          {% block content %}
            {% bookshop_include "page" content_blocks: content_blocks %}
          {% endblock %}
        </article>
</section>
    {% include "partials/footer.html" %}
</body>
...
This can be done even more complexly. If you want to want a widget that lists some items you can have a parent component for the list and then create a list item component that can only be added within the parent list component only.
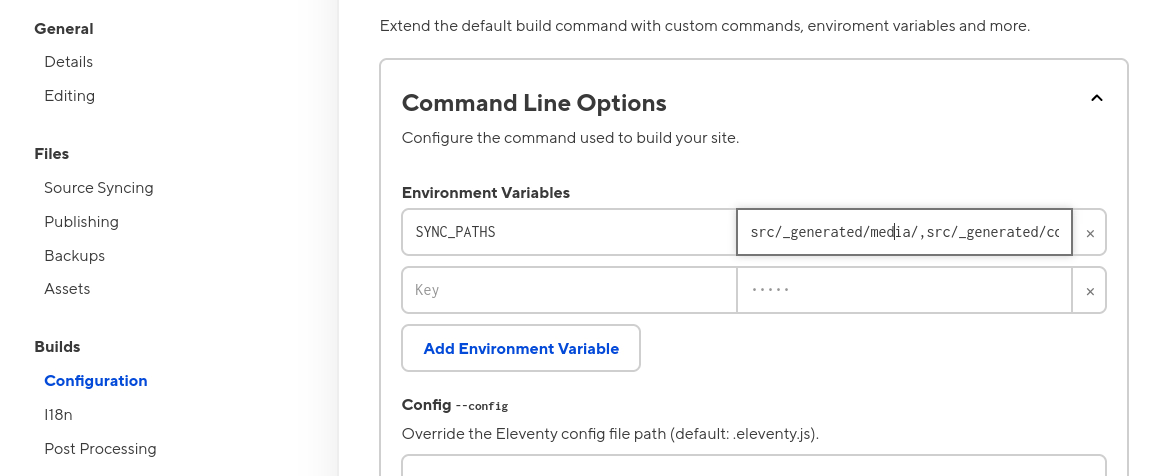
Media management
By default CC will expect that your folder for media files (like images) is exposed in the build output through addPassthroughCopy in case of 11ty. You may block this depending on the use case or allow it but prevent linking to uploaded images directly so that so the page uses properly sized and optimized images.
11ty image optimization is done through a shorthand, which is somewhat similar to the Astro image component. The problem is that shorthands aren't supported inside Bookshop components. Filters however are.
Here is a template filter defined in .eleventy.js config file:
eleventyConfig.addFilter("asOptimized", async function(imagePath) {
        if (imagePath.indexOf('/media') !== -1) {
            return imagePath;
        }
        if (imagePath.startsWith('/_images/')) {
            imagePath = `src/${imagePath}`;
        }
        let image = await Image(imagePath, {
            widths: [600],
            formats: ["webp"],
            urlPath: '/media/',
            outputDir: './src/_generated/media',
        });
        image = image.webp[0];
        return image.url;
    });
It takes the image path given by the CC editor generates an optimized thumbnail and stores it in /src/_generated/media which is copied as /media for the built site.
This then allows replacing the image uploaded with CloudCannon with an optimized one. When you have a layout that requires a specific size, ratio or just to prevent large files you would want to do something like this. It hides the logic of creating a proper image from a non-technical editor using CC.
In a Bookshop component template it could look like so:
<section>{{ text }}</section>
<figure>
<img alt="{{image_alt}}" src="{{image_path | asOptimized}}"/>
</figure>
It works, but for the CC editor, it requires handling of this side effect. CloudCannon will not notice new media files and will not commit them to Git. We have to configure the CMS to watch specific folders for such files:
Content collections
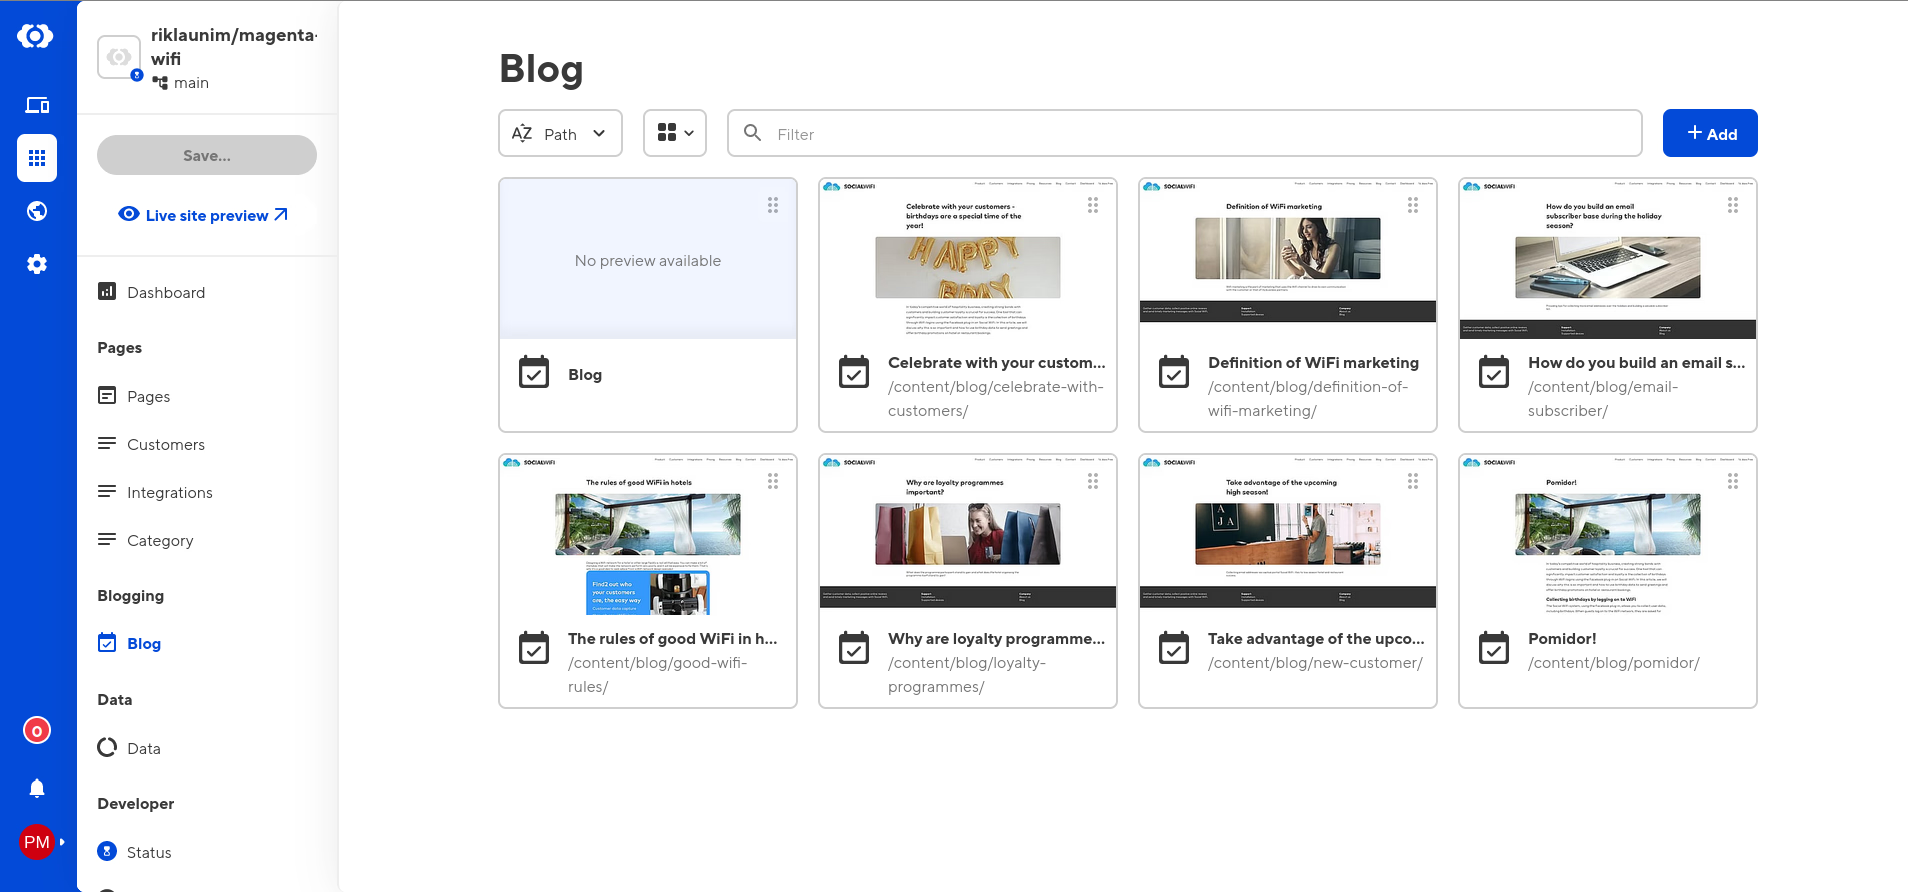
The editor recognizes content collections from the SSG and will list them in the side menu. You then can easily manage content in each collection. Some like blog
get custom treatment in the UI.
Aside from HTML editing there is also a markdown editor if you want to have some content, like simple text posts to be written in Markdown.
If a page in a given collection is quite complex then the best way to add a new one is to clone an existing one.
Conclusions
I did a site demo using CloudCannon editor and made a few components and the company I work for evaluated that and decided we will be re-making the business website using 11ty and CloudCannon. Right now it works as a Django website but there are a few issues with how it's operated. Each page is just raw HTML to edit and we have no control over images used (like size) or when we implement a new base layout for some pages some others remain on the old one and so on.
I did have problems starting. At first, the editor would crash due to bad configuration in the project, but that was resolved with the help of CC staff (you will likely be contacted by their customer care). The support is nice although as you could have seen to use CloudCannon you have to design the project around it. You take an SSG and code it to generate a website using components, content collections, and other data sources and then you make special components and edit rules for it to be editable in a non-tech-savy way through web editors.
As CloudCannon supports multiple SSG the support/features set differs between SSG and the implementations can differ quite a bit as well (like Bookshop between Astro and 11ty). This doesn't make it easier to master the APIs or promote the service through online tutorials as those get very specific about the software stack used.
Still, give it a try ;)
Comment article