PYNQ project giving FPGA capabilities to Python
FPGA is an chip that can be configured via a hardware programming language to make nearly any digital circuit. Hardware engineer can use them while Python developer can’t. But there is a distinct group of Xilinx FPGA based devices that can be used by software developers and data engineers, even with Python. This is possible thanks to PYNQ for Xilinx Zynq chips. In this article I'll showcase this platform and it capabilities.
Introduction
FPGA is configured by HDL - hardware description language like Verilog. When as on a microcontroller given pin is for example SPI on a FPGA it can be whatever it was programmed to be - wherever it's SPI, I2C or even USB, HDMI, Ethernet and alike. Aside of such I/O FPGA can do various type of processing and logic.
FPGA isn't something we can use as easily as Raspberry Pi, Micro:bit and similar boards. But there is an option to use Xilinx Zynq based chips that contain an FPGA.
Xilinx created an architecture called Zynq. It combines an FPGA with ARM cores and I/O into one product. The ARM part is called Processing System (PS) while the FPGA is called Programmable Logic (PL). Such concept isn't limited only to this company but Xilinx went further and created PYNQ (pink).
PYNQ is a hardware-software stack that allows using an FPGA via Python and Jupyter notebooks running on the chip itself. It doesn't replace Verilog, it doesn't allow you to create designs for the FPGA but it allows interfacing and using designs made by hardware engineers.
PYNQ from the software developer side is aimed mostly at edge data processing and analysis (video, image), data processing function acceleration and machine learning. Depending on design it can compete with edge NPU chips or CPU/GPU platforms like Nvidia Jetson (in terms of power efficiency and or flexibility. One of example usage cases are drones and autonomous robots - processing images and video streams to detect obstacles, collision detection, controlling drone flight and more... but there are simpler usage cases too ;)
PYNQ
PYNQ is an open source project made by Xilinx for their Zynq based boards. As the project website states you can use it to create high performance applications with:
- parallel hardware execution
- high frame-rate video processing
- hardware accelerated algorithms
- real-time signal processing
- high bandwidth IO
- low latency control
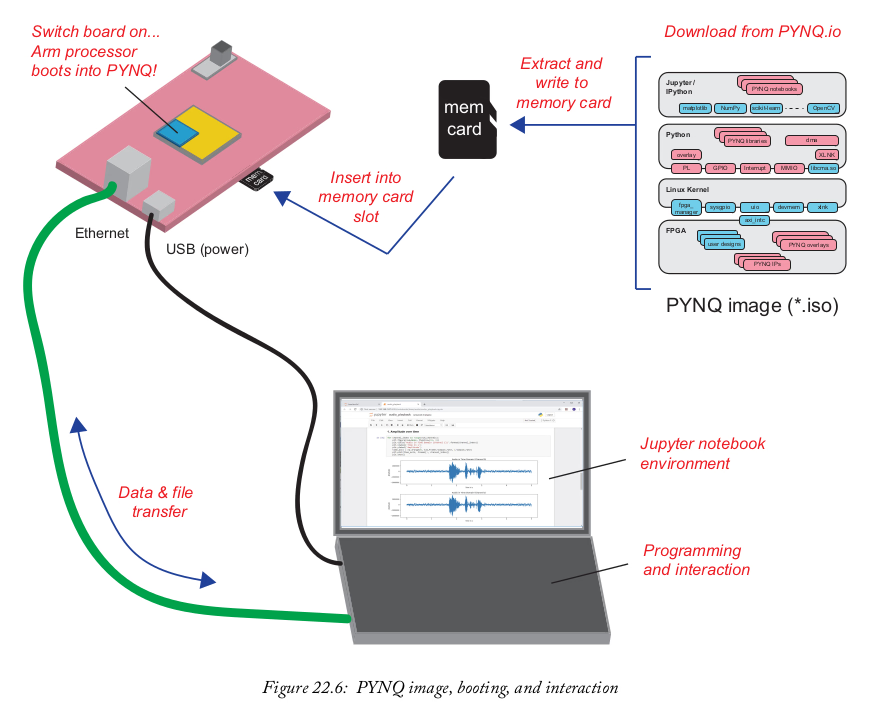
PYNQ big picture is quite simple. A Linux distribution is running on the ARM cores, it has Jupyter web server and configuration for the FPGA so that when the chip boots the FPGA is ready to work:
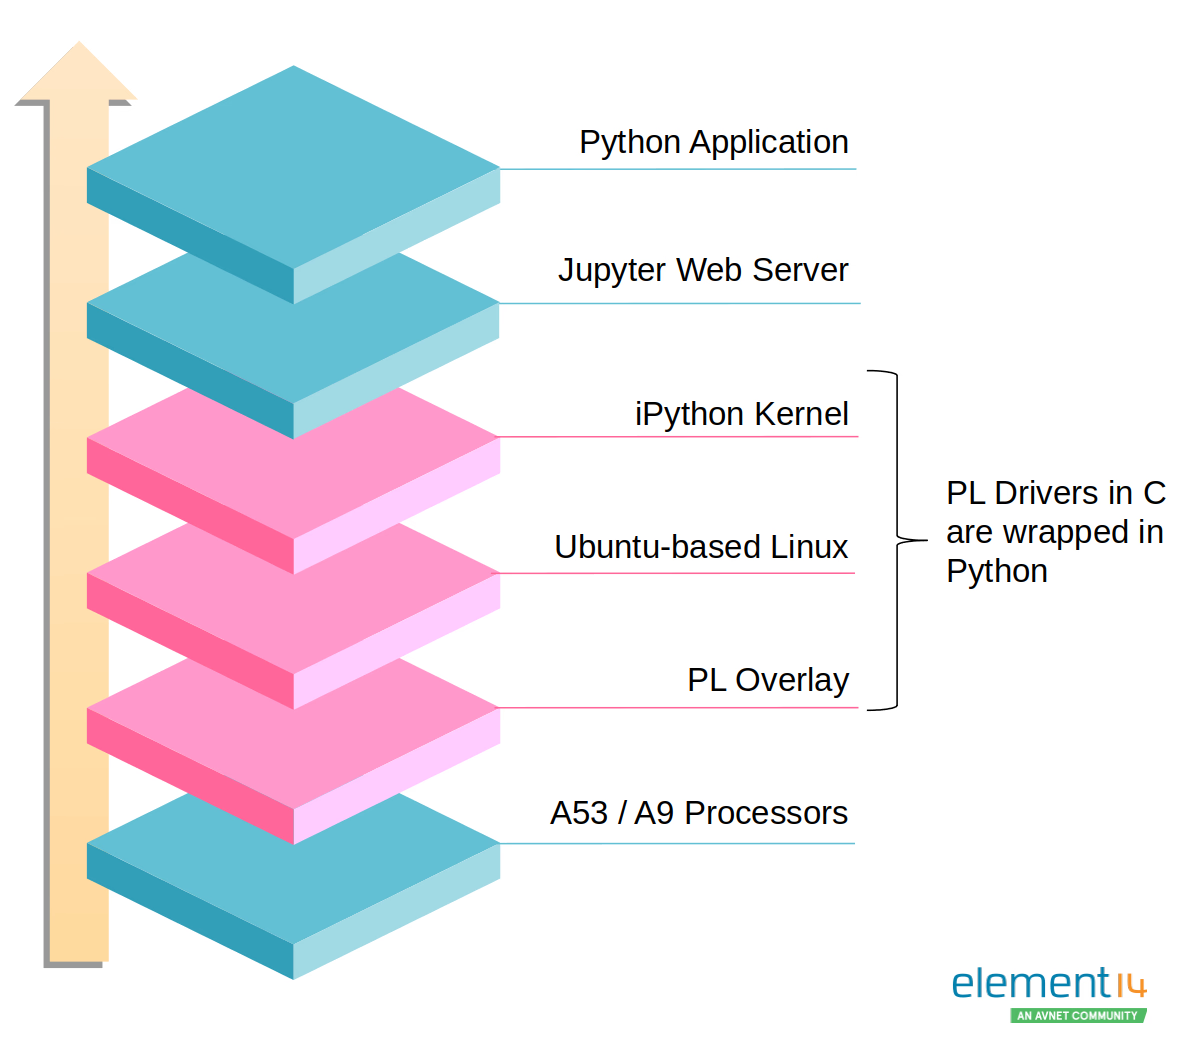
Looking at it in more detail reveals how each layer connects with others - from low level hardware to Python applications in Jupyter notebooks:
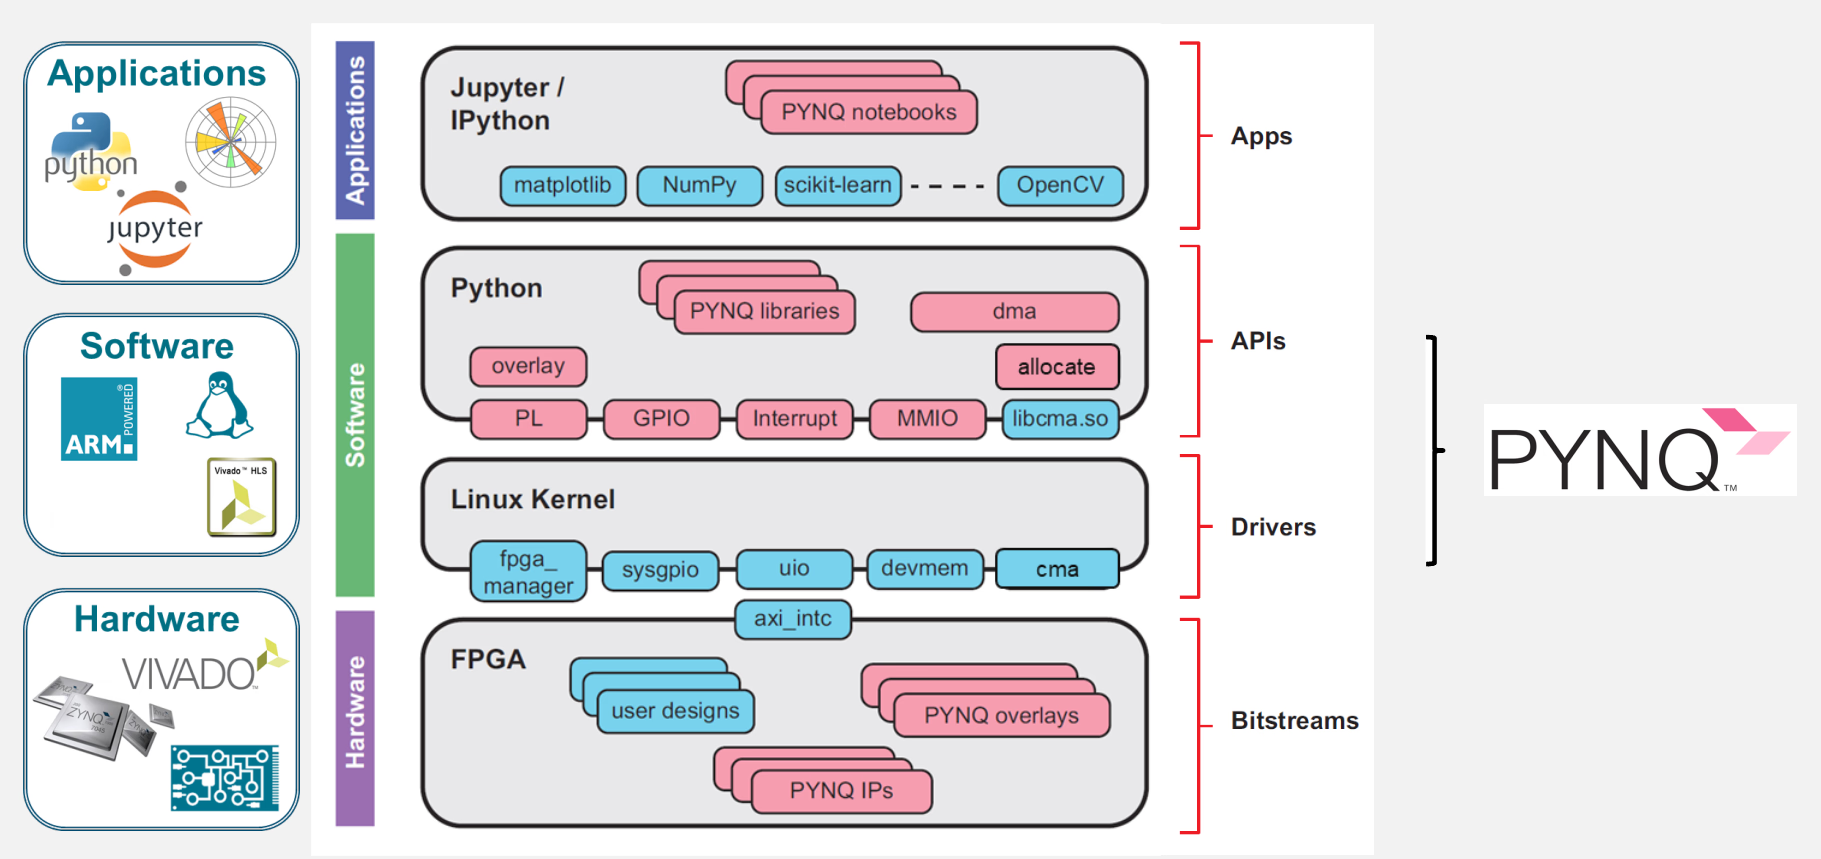
PYNQ overlay is a hardware design of the FPGA - it implements the logic on the FPGA - with Verilog and Vivado designer application. Hardware engineers can make various overlays and software engineers can use them in their applications. In-between we have Linux Kernel drivers and system libraries connect them together.
When you download and use the default PYNQ-Z2 board system image the overlay will configure the FPGA to work like so:
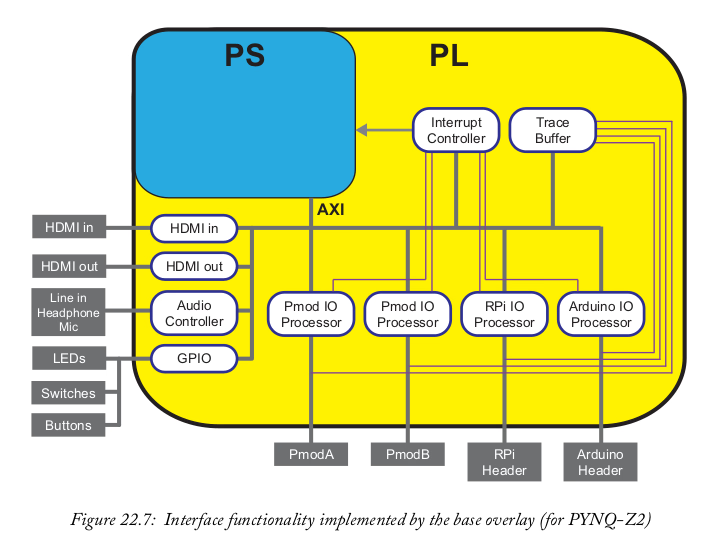
When using other overlays the pins on the board can function differently or have no logic assigned to them. This is the FPGA part where nothing is set in stone.
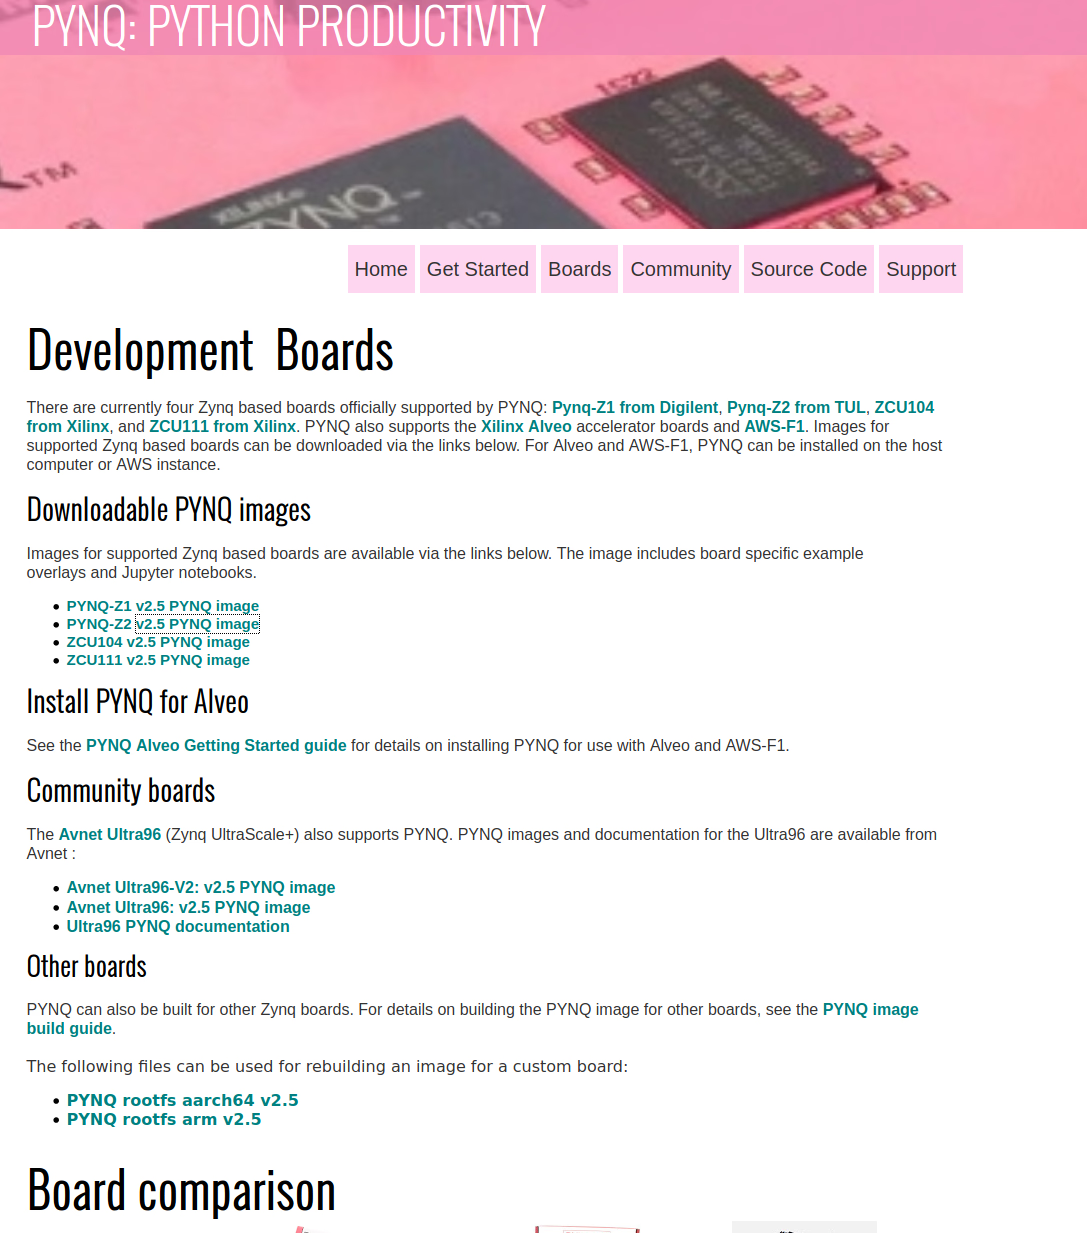
PYNQ Boards
There are four supported boards and few more supported by the community:
- PYNQ-Z1: first introductory board, less popular nowadays. Available for around $200
- PYNQ-Z2: second iteration, most common, available for around $120
- ZCU104: more advanced chip, evaluation board priced at around $1400
- ZCU111: even more advanced chip. Evaluation board priced around $11 000
- Avnet Ultra96: community supported, SBC priced at around $300
Right now PYNQ-Z2 is most popular and most accessible. If you want to try out PYNQ I would recommend this board. All of my tutorials will be based on this board.
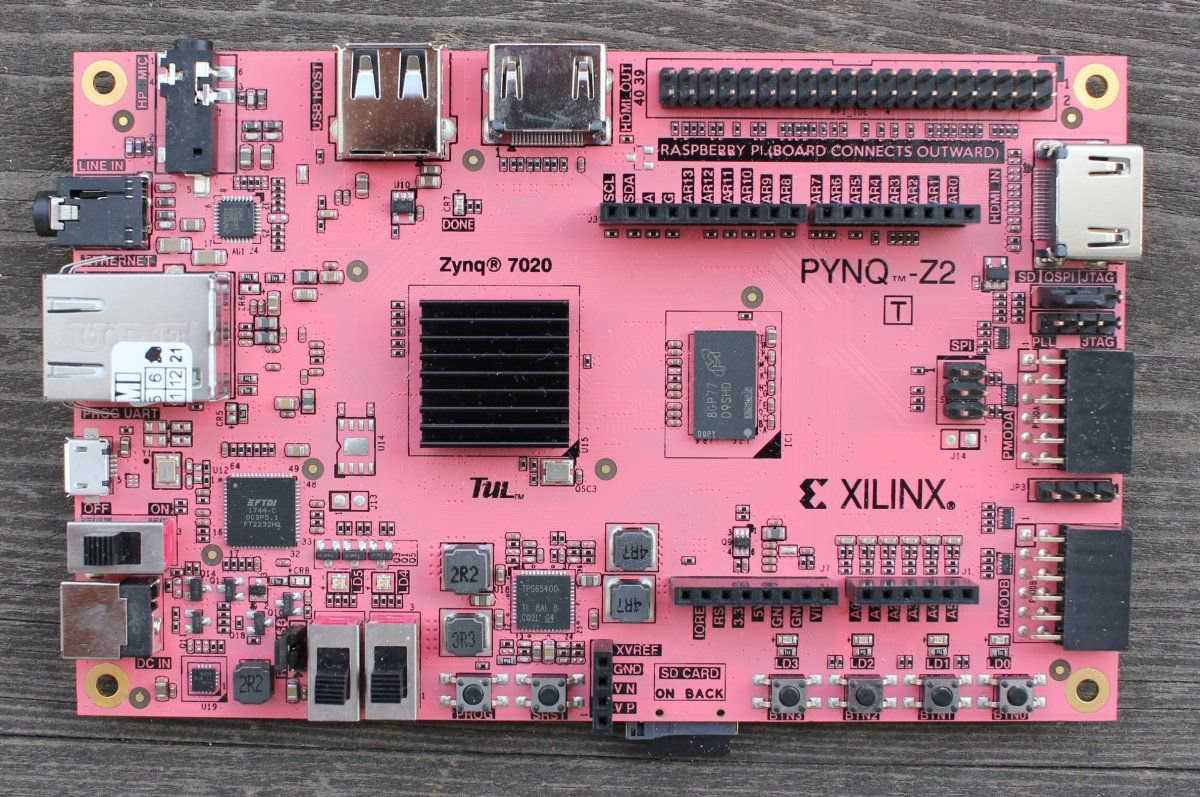
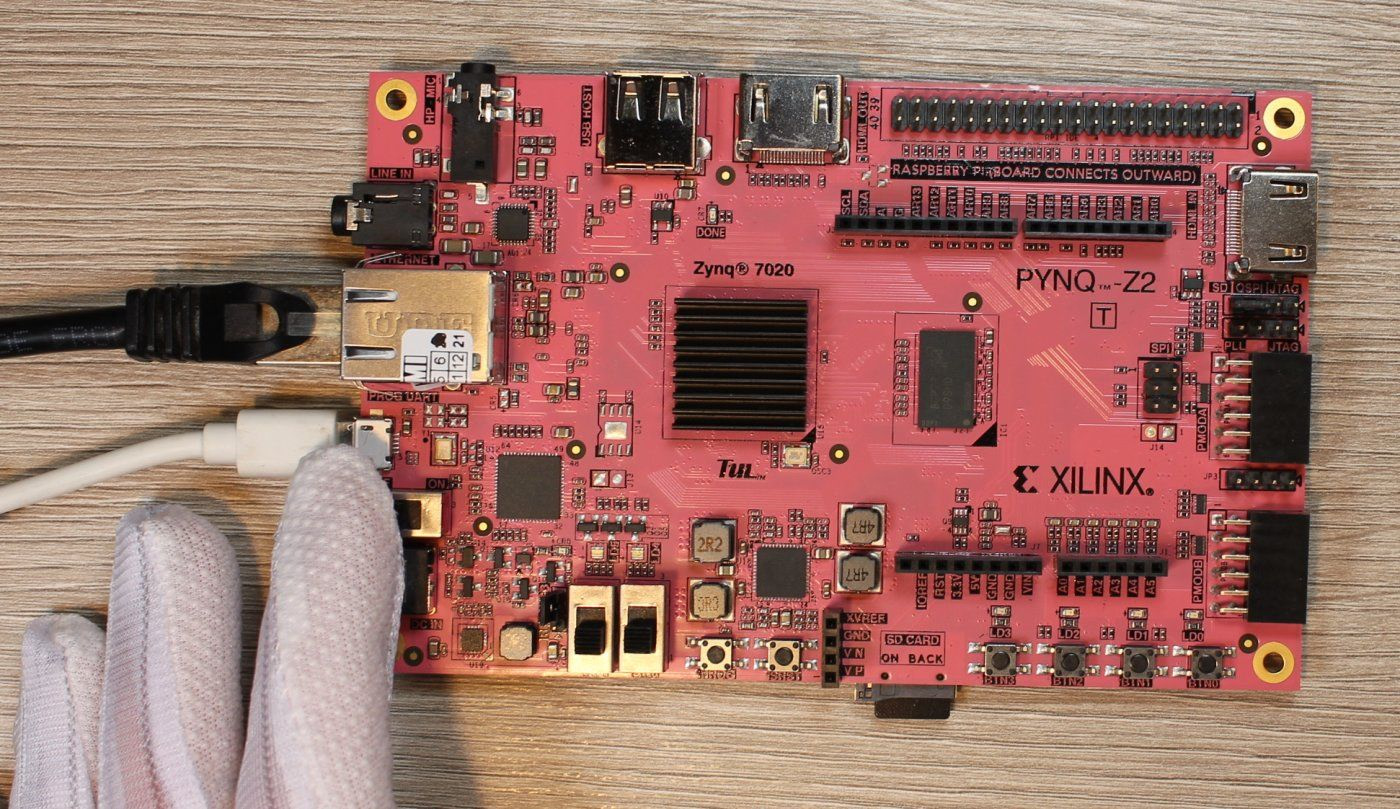
PYNQ-Z2
The board has Zynq Z7020 chip with 512MB of DDR3 memory. I/O consists of HDMI in/out (PL), ADAU1761 audio codec, GigE, USB HOST (PS), Arduino and Raspberry Pi headers, 2 Pmod headers, 6 user LEDs, 4 pushbuttons and 2 Dip switches. And it's pink.

Board setup
In the box you will get the board only. You will need a microSD card (16GB or more), micro USB cable and an Ethernet connection. Aside of that a PC from which you will use the Jupyter notebooks.
A 16GB or bigger microSD card is needed. Download latest image for your board. Extract the image from the archive and burn it onto the microSD card. Etcher is the recommended application for this. When it's done insert it into the microSD card slot on the board.
Next connect the Ethernet cable - the basic setup assumes that the board and your PC/laptop will be connected to the same network (router, access point). You can also use a direct PC-board Ethernet connection but that requires bit of configuration - you will find more info in the official documentation.
When that's done connect the USB cable to the micro USB port next to it. Connect that cable to your PC and flip the power switch:
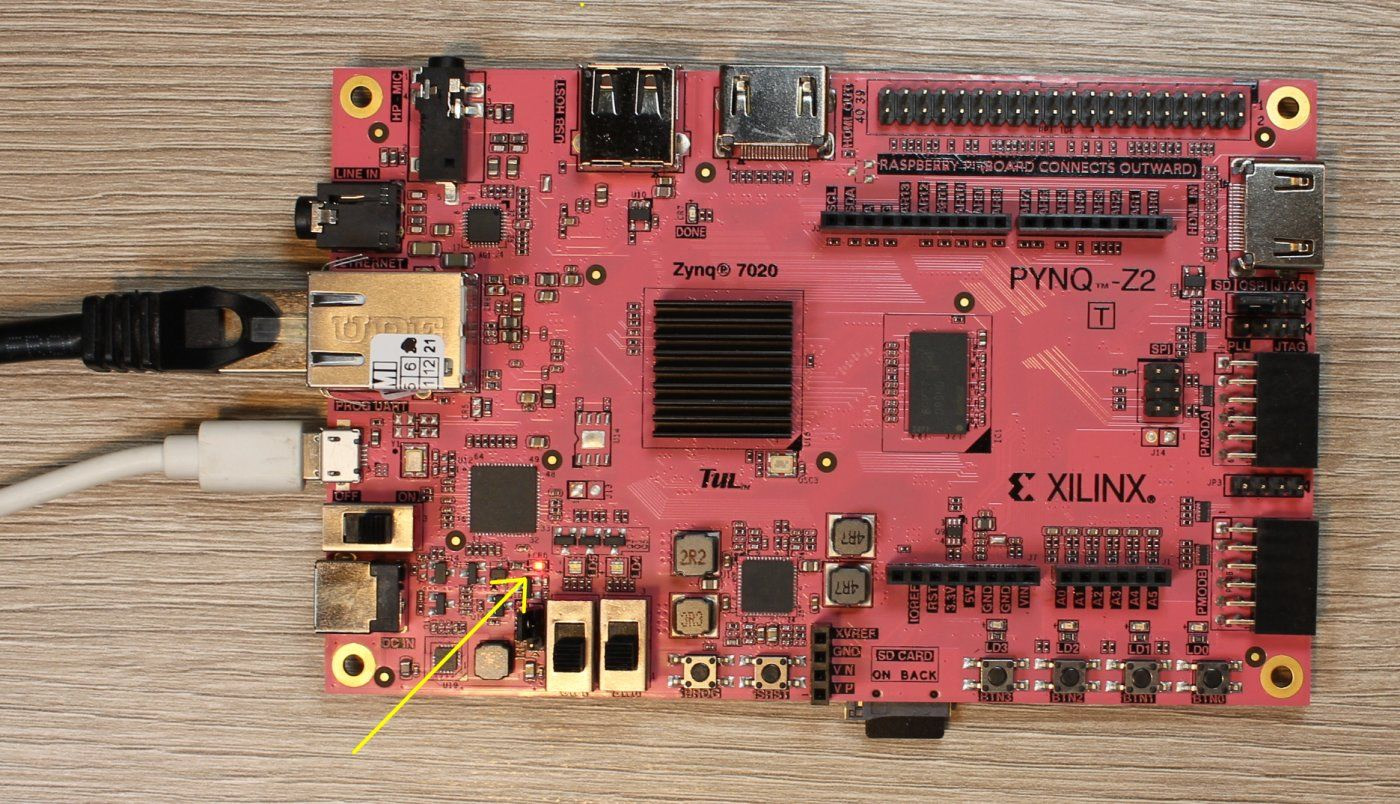
When you get the green light the board is ready to work. Depending on your system you may be already able to access it by opening http://pynq:9090/ in your browser. If it's not working no problem. We will get the IP address in a moment.
Serial connection
To install third party projects or to check the IP of the device a serial connection can be made in a terminal. Depending on the operating system the method will differ.
The USB connections provides power but also functions as a serial port. On Linux you can connect to the board via terminal using:
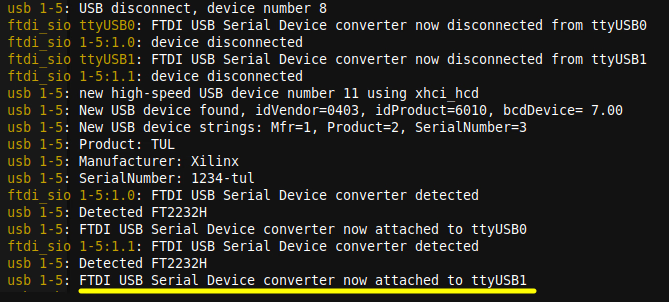
Where /dev/ttyUSB1
is the serial port created by the board. If you have more UARTs connected the number will be different. You can check dmesg logs after connecting the board to see what numbers it got:
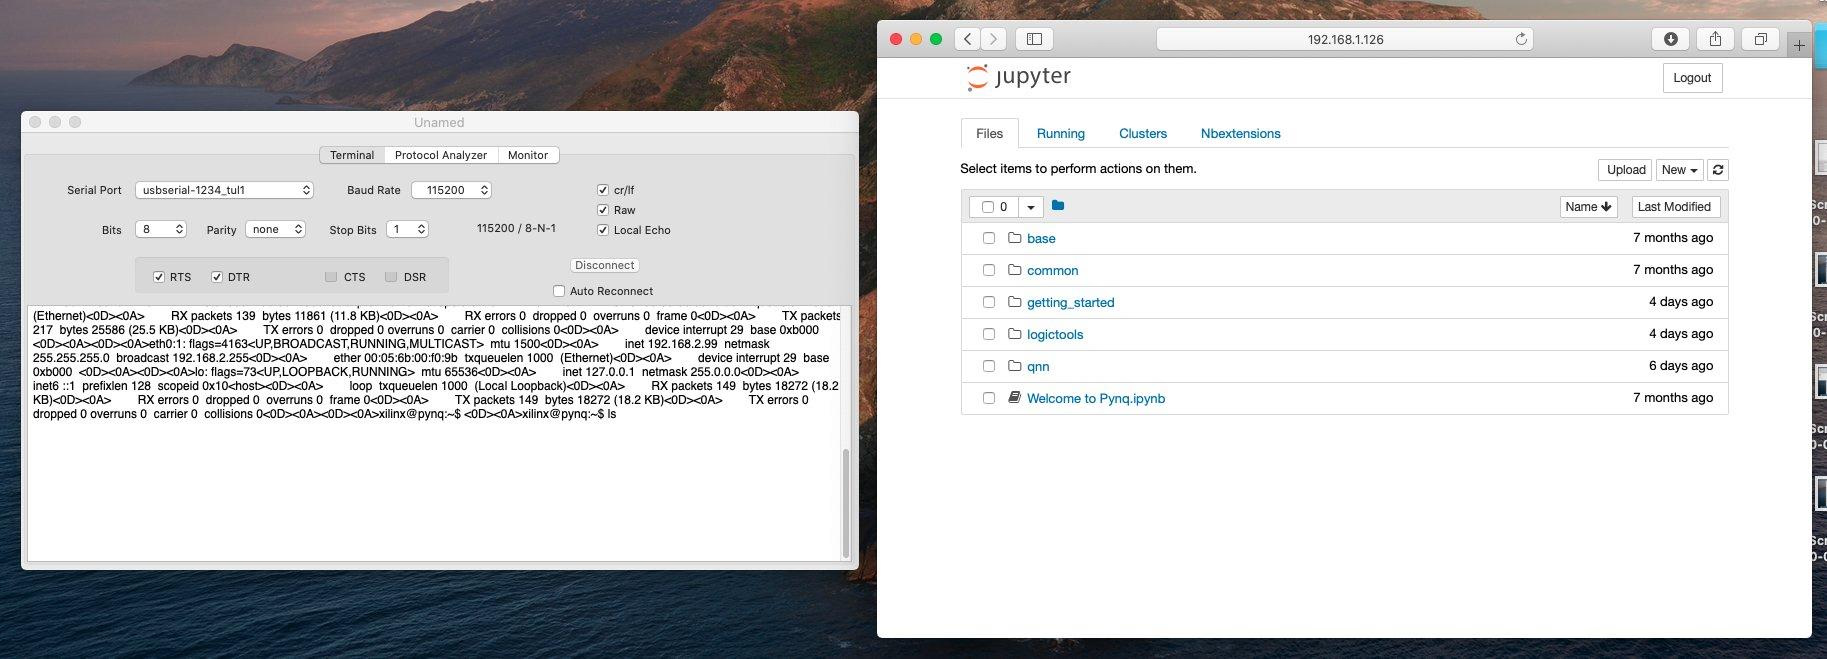
When connection is made you should see the shell prompt (if nothing shows up try pressing Enter). Now just type ifconfig to see what IP the board got:
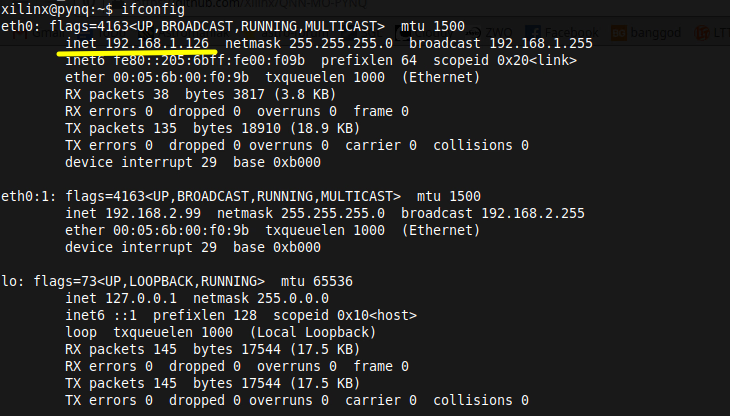
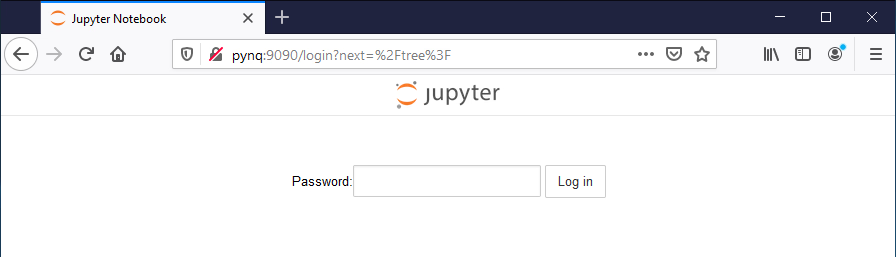
Now open http://IP:9090/ in your browser to access the notebooks. The password to Jupyter is xilinx
You can now start using the board. Jupyter is used to write and execute code while the serial connection can be used to install notebooks of other developers. sudo password on the board is xilinx
. If you have any issues with the setup check the documentation. The whole stack looks like so:
On macOS you also can use the terminal application but the USB serial device has a different name:
If you have problems with screen you can try one of serial console apps from app store.
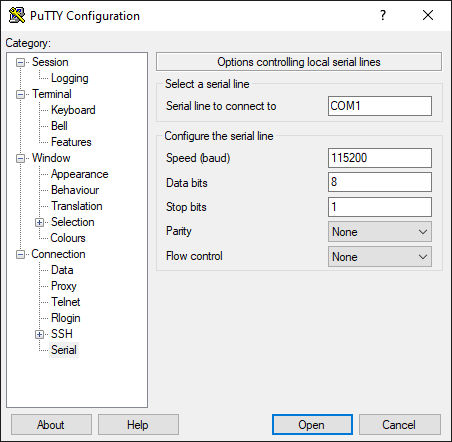
On Windows the pynq:9090
URL should work, where as to make a serial connection you will have to install Putty or other app for serial connections. UART chip drivers may also be necessary.
To list serial devices on Windows you can use:
Usually it will be COM1 if no other serial device is connected.
Alternatively you can use the router software to check the IP of the PYNQ board - if it provides such information. Similarly IP/Port scanners could be used if needed.
SSH connection
Having the IP address of the device you can make a SSH connection via terminal or an app:
The password is xilinx
. SFTP in file managers that support it also works:
Working with Jupyter notebooks and PYNQ
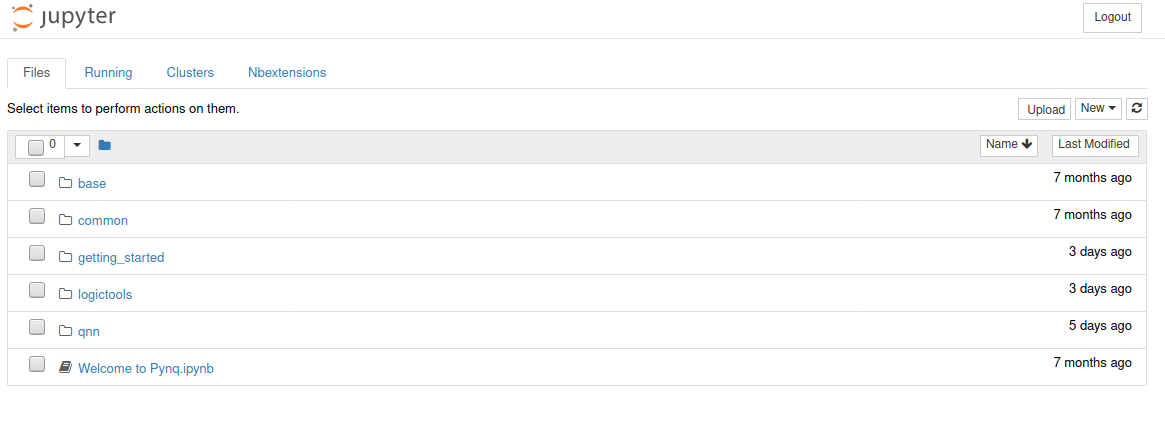
The PYNQ-Z2 system comes with a set of example notebooks showcasing features and capabilities of the board. You can navigate through folders and open an interesting notebook.
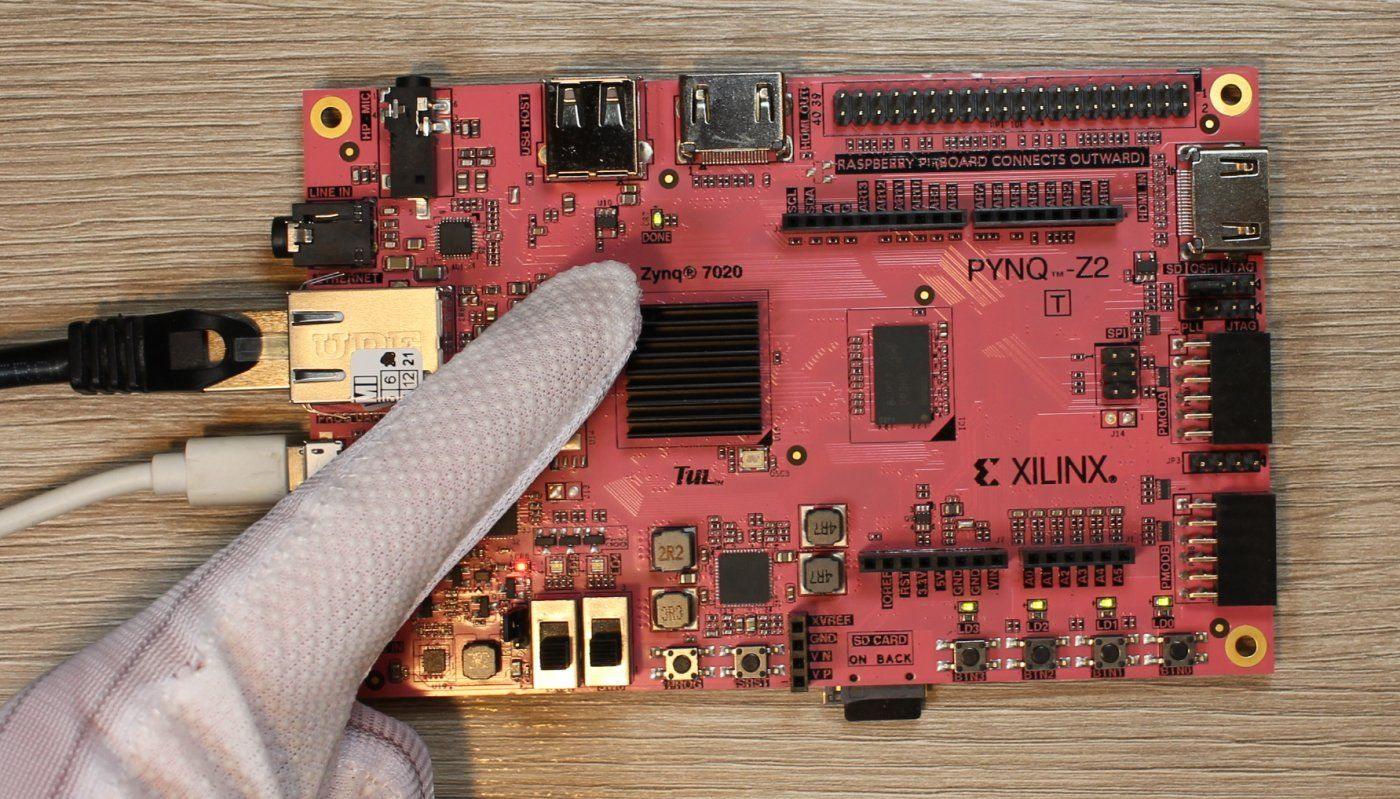
To get started open base/board/board_btns_leds.ipynb - this notebook contains a simple code binding LED actions to press events of the buttons on the board.

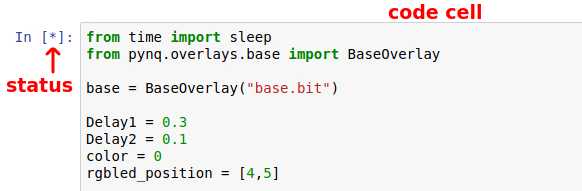
Select the cell with the code and run it. The status will then change to an asterisk. Non-blocking code blocks will finish executing and you will see a number instead of the asterisk. This example is blocking and will end when you press the fourth button. Pressing first will change the LED colors while button 2 and 3 will light up LEDs back and forth.
Notebook has to be explicitly stopped to stop running. Closing the browser window won't stop it. Either use the File
- close and halt
option or halt the notebook from notebooks list after closing the tab with open notebook.
More advanced notebooks will have multiple code cells. You have to execute them in order one by one to get to the desired result. All of the included notebooks also have some markdown cells with description and documentation. When making a notebook you want to share be sure to add your own description and split the code into smaller cells as needed.
To install a third party notebook you need the SSH or serial connection and do it like so:
This may take a while as dependencies being installed. When it's done reload the opened Jupyter listing and you should see the notebook being available. Some community notebook projects are on PYNQ website while many more are on Github.
In a subsequent article I'll try to go over interesting projects as well as overview the capabilities of the base overlay of PYNQ-Z2.
Additional resources
- zynq-mpsoc-book.com - a book about Zynq and PYNQ with free PDF version available
- PYNQ highlighted community projects
- github - other community projects
- PYNQ-Z2: Embedded Vision Workshop
Comment article