Programmatically creating videos and animated GIFs in Python
Video editing is an art of it own but sometimes you may have to generate a short video programmatically - like a marketing or manual type of content that uses data from your application at the time of creation. This can be done in Python although it won't be that easy. MoviePy and Gizeh can be used to create animated GIFs or video clips with text, images, animated vector graphics and alike. Let see what they can do.
Gizeh and MoviePy
Gizeh is a wrapper around Cairo library and tries to make working with it easier. This library can be used to create vector drawings. To use it you have to have Cairo installed on your system.
MoviePy is a video editing library that has a similar function set as a desktop video editor application and thus allows creating video editing flows programmatically.
Lets have a look how this can work together:
import gizeh as gz
import moviepy.editor as mpy

COLOR = (1, 1, 0)
VIDEO_SIZE = (680, 300)
DURATION = 3
FPS = 10


def render_text(time):
    surface = gz.Surface(640, 80, bg_color=(0, 0, 1))
    text = gz.text('Hello World', fontfamily="Tahoma",
                   fontsize=50, fontweight='bold', fill=COLOR, xy=(320, 40))
    text.draw(surface)
    return surface.get_npimage()


text = mpy.VideoClip(render_text, duration=DURATION)

video = mpy.CompositeVideoClip([
    text,
], size=VIDEO_SIZE).set_duration(DURATION)

video.write_gif("test.gif", fps=FPS, opt="OptimizePlus", fuzz=10)
# or:
# video.write_videofile('test.mp4', fps=FPS)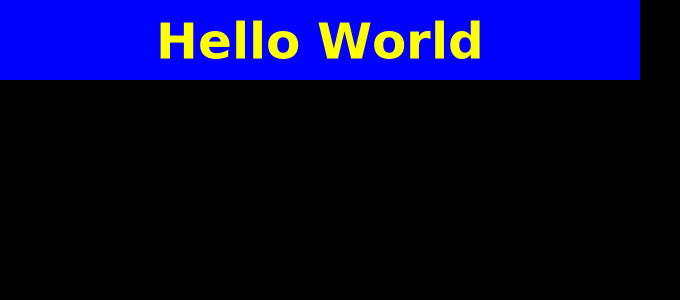
We have a render_text function that uses Gizeh to write a text on a surface. This is similar to using Pillow to write text on an image surface (canvas). For MoviePy we return a numpy array of that graphic surface.
The function will be passed one argument from MoviePy and that is current time of the video. For each frame MoviePy will call each used function so we can take time into account and create time based animations or other changes to the function result. In this example the time argument is ignored so each frame has the same result and the clip looks static.
Second key part is mpy.CompositeVideoClip where you combine various elements of the video frame. You specify what is in the frame and it position on it. As you can see in the example the text is positioned to left, but we can change this by giving coordinates or some shorthand options like:
video = mpy.CompositeVideoClip([
    text.set_position(('center', 20)),
], size=VIDEO_SIZE).set_duration(DURATION)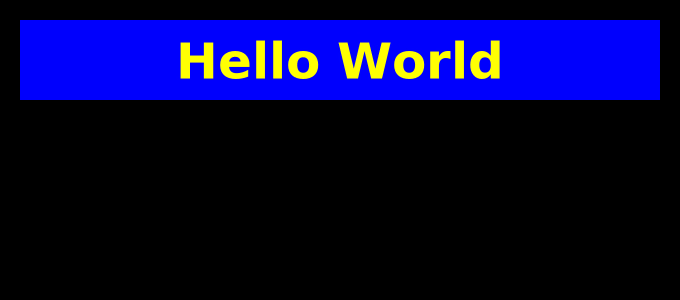
We used shorthand center
to center the 640x80 text surface in X axis of the frame. For Y axis I gave it fixed 20px of padding.
We can also use other media, like static images:
text = mpy.VideoClip(render_text, duration=DURATION)
company_logo = mpy.ImageClip('path/to/image.png')

padding = 20
video = mpy.CompositeVideoClip([
    text.set_position(('center', padding)),
    company_logo.set_position(('center', text.size[1] + padding + padding)),
], size=VIDEO_SIZE).set_duration(DURATION)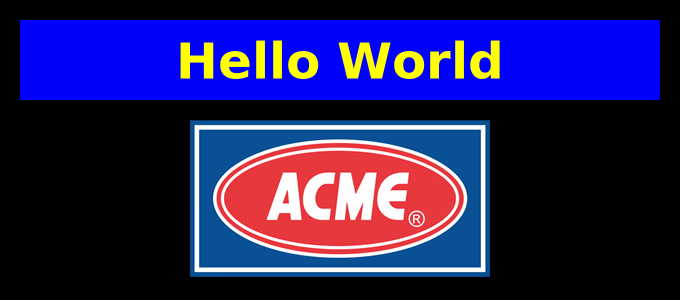
Using image as a background is possible, just list it first in the CompositeVideoClip:

Note that by using JPEG files you will make animated GIF files really large, even after size reduction (and usually with quality artifacts). For such clips I recommend using only video file formats.
As you can see on the above result image the text surface has it own background color. With a background image it's quite common to have transparent or semitransparent surfaces. It's bit tricky to make it work for a video clip but MoviePy can use a mask for the background color of the Gizeh surface:
def render_text(time):
    surface = gz.Surface(640, 80, bg_color=(0, 0, 1, 0))
    text = gz.text('Hello World', fontfamily="Tahoma",
                   fontsize=50, fontweight='bold', fill=COLOR, xy=(320, 40))
    text.draw(surface)
    return surface.get_npimage(transparent=True)


def set_transparency(drawable):
    clip_mask = mpy.VideoClip(lambda t: drawable(t)[:, :, 3] / 255.0, duration=DURATION, ismask=True)
    return mpy.VideoClip(lambda t: drawable(t)[:, :, :3], duration=DURATION).set_mask(clip_mask)


text = set_transparency(render_text)
Here we have few changes. First we also specify alpha channel for surface background color - bg_color=(0, 0, 1, 0). 0 - 100% opacity, 1 - 0% opacity. As for the color it's RGB but Gizeh doesn't use 0-255 value range but 0-1 instead.
Second change is returning numpy array with alpha channel as well: return surface.get_npimage(transparent=True) and third is set_transparency helper function that makes a clip mask that handles surface background color opacity.
With Gizeh you can also do vector drawings. Having a simple geometric shape we can then animate it by changing it parameters with time - wherever position, color or other. Here is an example:
import math

import gizeh as gz
import moviepy.editor as mpy


COLOR = (1, 1, 0)
VIDEO_SIZE = (680, 300)
DURATION = 3
FPS = 10
VIDEO_BACKGROUND = (255, 255, 255)


def render_text(time):
    surface = gz.Surface(640, 80, bg_color=(0, 1, 0, 0.5))
    text = gz.text('Hello World', fontfamily="Tahoma",
                   fontsize=50, fontweight='bold', fill=COLOR, xy=(320, 40))
    text.draw(surface)
    return surface.get_npimage(transparent=True)


def set_transparency(drawable):
    clip_mask = mpy.VideoClip(lambda t: drawable(t)[:, :, 3] / 255.0, duration=DURATION, ismask=True)
    return mpy.VideoClip(lambda t: drawable(t)[:, :, :3], duration=DURATION).set_mask(clip_mask)


def draw_stars(time):
    surface = gz.Surface(640, 100, bg_color=(0, 0, 1, 0.5))
    for i in range(5):
        current_fill = (math.cos(time), 0, math.sin(time))
        star = gz.star(nbranches=5, radius=120 * 0.2,
                       xy=[100 * (i + 1), 50], fill=current_fill,
                       angle=time * math.pi)
        star.draw(surface)
    return surface.get_npimage(transparent=True)


text = set_transparency(render_text)
stars = set_transparency(draw_stars)


padding = 20
video = mpy.CompositeVideoClip([
    text.set_position(('center', padding)),
    stars.set_position(('center', text.size[1] + padding + padding)),
], size=VIDEO_SIZE).on_color(color=VIDEO_BACKGROUND, col_opacity=1).set_duration(DURATION)
# video.write_videofile('test.mp4', fps=FPS)
video.write_gif("test.gif", fps=FPS, opt="OptimizePlus", fuzz=10)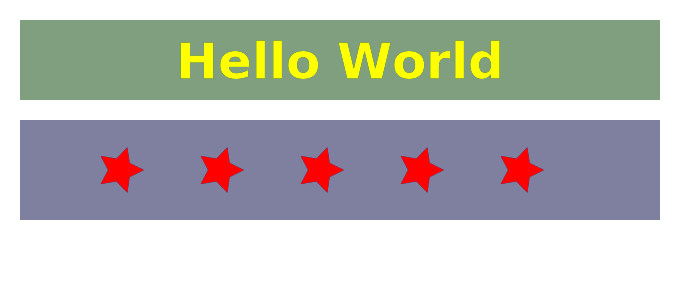
Here we have draw_stars function that uses a 50% transparent blue surface to then draw 5 stars using the gz.star function. Current frame time is used to make star color and star angle dynamic - thus they change with time creating an animation.
Such vector animations can be way more complex. You can see some examples on zulko.github.io and stackbuilders.com.
Video editing with MoviePy
MoviePy can be used to create video editing flows known from desktop video editors. There are some examples in documentation. This get complex quite quickly. For example if you would want to do a slideshow of images as a video clip it would look like this:
import moviepy.editor as mpy

clip1 = mpy.ImageClip("images/a1.jpg").set_duration(5)
clip2 = mpy.ImageClip("images/a2.jpg").set_duration(5)
clips = [clip1, clip2]

animated_clips = [mpy.CompositeVideoClip([clip.fx(mpy.transfx.crossfadein, 1)]) for clip in clips]
final_clip = mpy.concatenate(animated_clips, padding=-1)
final_clip.write_videofile('transitions.mp4', fps=10)
This could be used to create a video gallery from preexisting images to then use on some social media but also vector/PNG images generated by Pillow or Gizeh containing marketing materials and alikes.
Comment article